Read here how different kinds of lighting will help your photography.
What Do We Mean by Photography Lighting?
The word photography comes from the Greek roots φωτός (phōtos or phōs) “light”. Mixed with γραφή (graphé) it adds “representation using lines” or “drawing”. Altogether, it means “drawing with light”. Photography without light is like trying to write without ink, paint without paint and using your iPhone without battery. You can’t. As you can see, it’s not only important…it’s necessary. There are two ways to capture light using your camera. One is natural light, which is the most widely used because it’s already there. The sun gives it to us for free, so it would be silly not to take advantage. The other is artificial light, added to our scene from flash or continuous lighting. Ambient light is another term that you need to be aware of, and it can be natural or artificially present. By reading our extensive guide, you will learn how to fully utilize light in all its glory.
12 Photography Lighting Facts You Should Know
Knowing as much as you can about lighting will help you with your photography. It is a difficult area to master, but how the light hits your subject is very important. You can experiment with side lighting, backlighting, and many ways to soften harsh shadows. To get to know more about different lighting methods, read our article about 12 photography lighting facts.
Best Lighting Equipment To Get Started With
There are many different lighting systems available. A studio tends to have big, powerful units. It’s also usually plugged into the wall. Smaller versions, known as Speedlites, are portable and run off AA battery power. This thorough article gives you all the information you need to get started.
How to Easily Understand Colour Temperature
Having light hit your subject is paramount in being able to capture them. But there are many different types of light sources you can use. Every light source has a colour. This colour cast is added to any subject or object that the light hits. The closer the subject is to the light, the stronger the colour cast is. Have you have ever tried to capture an indoor scene, and felt it was too orange? This is the colour temperature of the light source, the light bulb in this case. For the most part, you can fix this in post-production. But you should aim to set a correct white balance in the camera. This article will give you all the information you’ll need.
Underexposure vs Overexposure: Everything You Need to Know
When photographing an outdoor scene, you’ll often encounter a mix of light strength. For example, capturing a building and the sky on a sunny day. If you use the light meter reading for the building, the sky will overexpose. This means it will lose all of its details. Similarly, if you use the light meter reading from the sky, the building will be too dark. This underexposing makes it difficult to see the present details. Here, the sky is about 2-3 stops lighter than the building. There are ways to correct this problem, all of which you can find in our article.
How to Use a Slow Sync Flash
There will be many times where you’ll want to capture more ambient light in a scene. Photographing indoors means low light, and slow shutter speed is necessary. But as you use slow shutter speed, everything becomes blurry. This is down to camera shake. The shutter is open long enough to capture the slightest movement. This is where slow sync comes in. A slow shutter speed adds more light, and the flash freezes the subject. This eliminates the shake and blur. Read our article here on how and when to use it.
How to Photograph Fast Action in Low Light
Low light is always a challenge for photographers, as we often need to trade quality for exposure. Action photography and low light are like bickering siblings. They don’t go hand in hand, as the settings for both scenarios clash. Focusing on the light will present the blur, and obtaining the action means an underexposed image. Here, you will need aperture, ISO and shutter speed. Using these effectively helps capture enough light, keeping the quality of the image high. Read here on why your lenses are important for low light. And also how to use your camera for higher quality images.
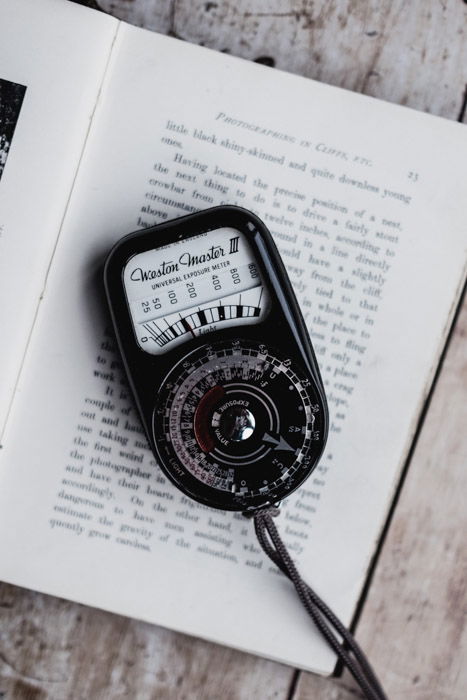
How to Use a Light Meter for Better Photography
There was a time where if you didn’t use a light meter in your photography, you would have to make an educated guess in capturing the correct exposure. Fashion and portrait photography were the main users of these meters, working with complex lighting systems. Now, all our cameras have an inbuilt light meter, helping you capture the right amount of light. Read here on why you need a light meter, and which of the two different ways would suit you better.
How to Choose (and Use!) Hard Light vs Soft Light
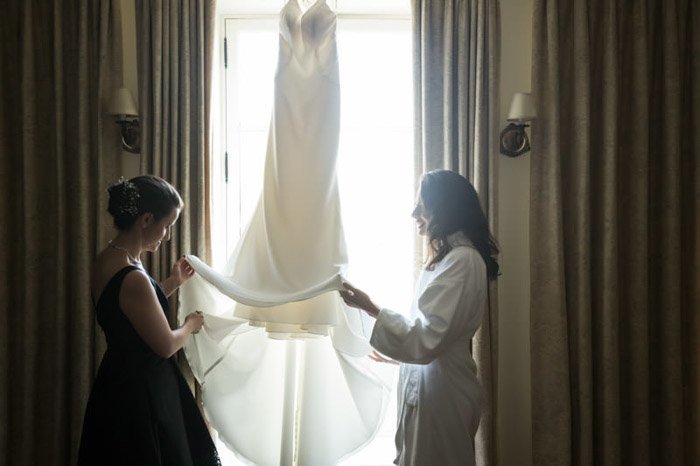
There are times when you are looking for soft light. For example, capturing a bride as she is dressing for the big day. At other times, hard light is needed. Especially if you are looking for contrast in your scene. Our article runs through how to create and take advantage of these two lighting styles.
How To Effectively Use Backlight in Photography
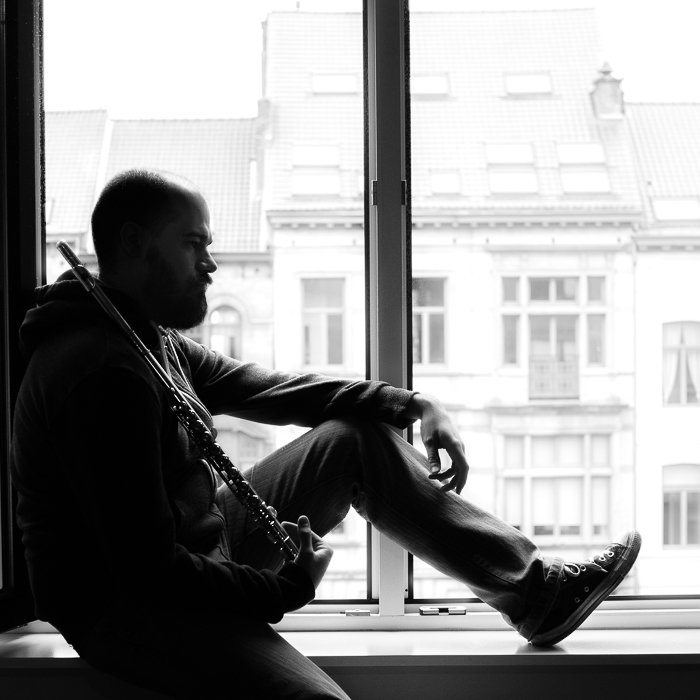
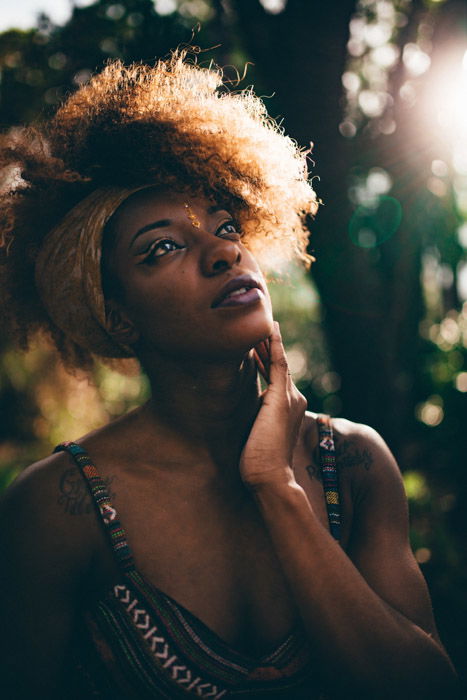
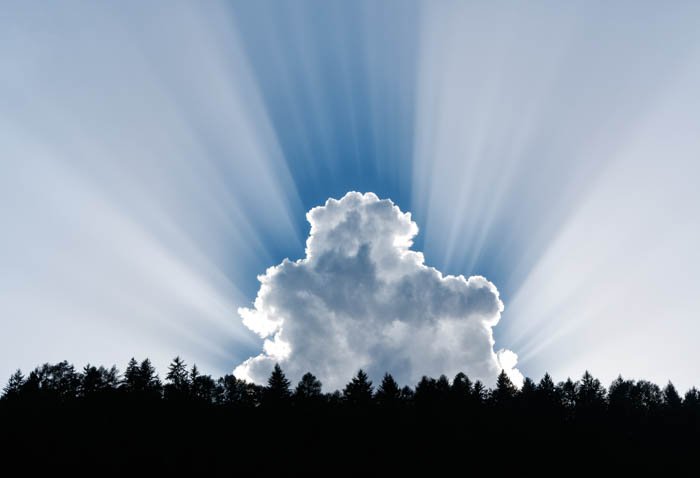
Backlighting your subjects gives you more of the background in your shot. Instead of hiding it, you let it shine, boosting your subject in the front. By adding light in the background, you create an airy and warm scenario. It isn’t as moody as a full-frontal light situation. This lighting technique also allows you to create silhouettes.
The Easy Guide to Shooting High Key Photography
If your scene is giving your camera a lot of light, you might consider high-key photography. The high-key refers to the excessive use of lights and lighting in the image. This is a technique you would use for product photography. It allows you to remove most if not all detail from the background. It can also come in handy for creating artistic portraits For all high-key photography questions, tips and techniques, read our article here.
Natural Light Photography
How to Take Control of Natural Light with Photography
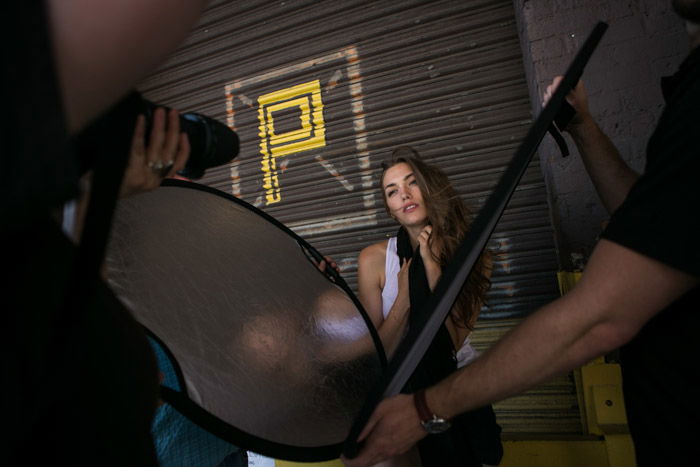
Most photographers love natural light. It is free, it’s abundant and easy to work with. To harness the full power, you will need to diffuse or even flag the light. One recommendation is to know how you can use your reflectors effectively. By bending and warping the reflector, you can change how the light hits the subject. By making it concave, you help to intensify the light and create a spotlight, rather than a soft lighting effect. You can also make your own DIY reflector easily at home. Check out our article to learn more about making use of natural light.
What’s The Best Time to Take Natural Light Photos Outside?
Natural light has many advantages. It’s free, abundant as is right with you where ever you go. At midday, the sun is at it’s strongest, no matter where you are. At other times of the day, natural light changes. The golden hour is the period of daytime shortly after sunrise or before sunset. This gives your scene a ‘golden’ warmth to it. The time of the year also denotes how the light plays with your subject. Our article here has all the tips and information about the best time to take natural light photos.
Flash Lighting
When You Should and Should NOT use a Flash
When to use a flash is one of the most asked questions regarding photography. Some photographers steer clear from it, as they want to remain candid shooters. A flash can add a significant change to your images, day and night. You can use it as a main light or even a fill to an otherwise well-lit scene. There are times when a flash is a big no-no. Some events or concert photography makes using a flash impossible. Read our article on all the information you need. To flash or not, that is the question.
How to Use a Wireless Flash Trigger
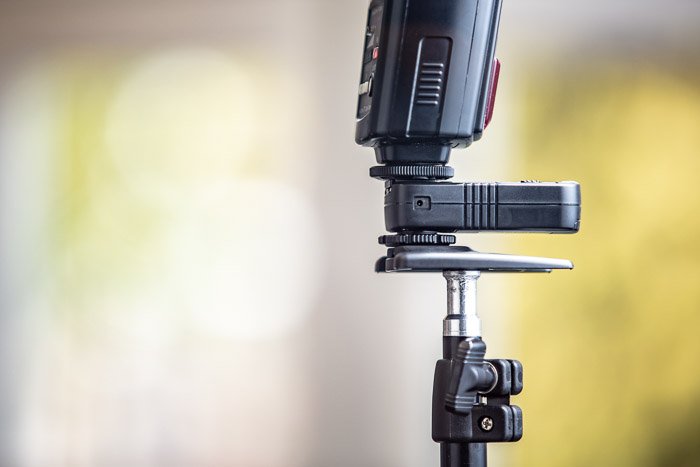
A wireless flash trigger lets you control an off-camera flash. Here, the speedlight flash connects to a wireless hot-shoe which connects to a transmitter. This sits on your camera’s hot-shoe. The signal is sent wirelessly, allowing you to place your flash anywhere. Perfect for scenes where a flash on your camera is detrimental. It is a very simple device to use, as long as you get the right one. We have all your questions answered here.
What Is a TTL Flash? (TTL vs Manual Flash Modes)
A TTL (Through the Lens) flash uses your cameras on-board metering system. This allows the flash to intelligently ‘judge’ how much light to pump into the scene. This can be a hit or miss, as it depends on your scene and metering mode used. For example, spot metering mode forces the flash to add enough light just for that single point. When using evaluative, the flash will add enough light to bring up the exposure of all objects. This can lead to over-exposure and loss of details. Perfect for high-key photography lighting though. If you’re stuck between TTL and manual flash modes, we have the article for you.
Best Tips For Bounce Flash Photography
A bounce flash is a great way to light a subject, especially if you’re looking for a soft-lighting exposure. Harsh light isn’t the best fit for all types of photography. Perhaps the subject in front of your camera has a light colour range. With bounce flash, you retain the details within it. How do you bounce the light? As your speedlight or flash utilizes a swivel head, it can be turned many ways. This allows you to point the light source to walls, ceilings, and reflectors. Harness the power of the bounce flash here. It might be the trick you’ve been looking for.
How to Use Fill Flash
Undoubtedly, we will deal with situations where the scene will have varying degrees of exposure. The background might be lighter than your subject. Here, a reflector can bounce a little more light back into the shaded areas. For a stronger light source, consider using a flash. By adding a little light from a flash, you can bring out the details that fall into shadow. This light is known as a fill flash. This is a very handy photography lighting trick, especially for situational portraits.
Best Flash for Nikon DSLR Camera
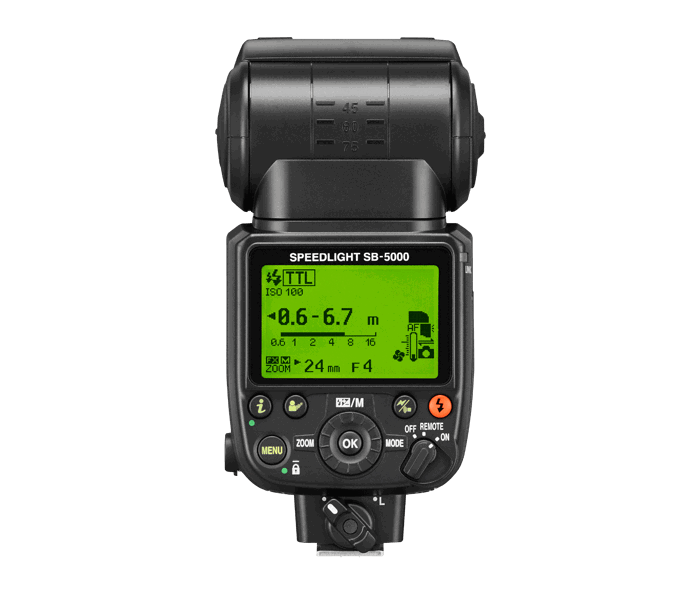
All flashes are equal, but some flashes are more equal than others. Believe it or not, every flash or speedlight utilizes different settings that can help your photography. So which one should you use? We take into account five of the best flashes available. If you own a Nikon camera, the answers are here.
Food Photography
How To Improve Your Food Photography With Natural Light
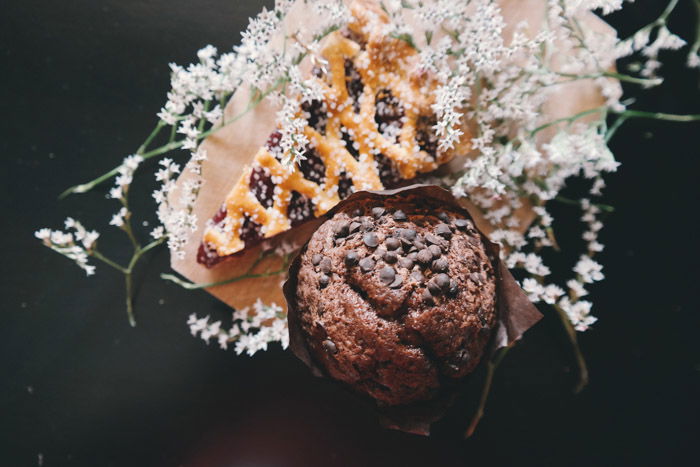
Using natural light might be the best way to start and practice with. It is abundant, free and everyone has a window they can use as their source. It is also available outside for shoots, for example, in a park or on-location. Here, a diffuser sits between the window and the food. This creates an even light fall and to take away the intensity of the light source. Reflectors can be used to help bounce the light back towards the subject, softening harsh shadows. By no means is it easy, but it is by far the cheapest option that works any time of the day.
One Light Set-Up for Food Photography
Rather than using natural light, a softbox is a great option. Great for studios with no windows, or times when the sun isn’t as strong as you want it to be. The softboxes are pretty inexpensive, easy to put up and pack away. It is a viable choice. Using one light will leave you one set of shadows. Combining the light source with reflectors help to minimalize these harsh areas. This helps pull out the detail and gives a constant flow of light This tool is easily moved for different angles, and it also dims or intensifies the light.
Studio Lighting
Tips for Setting Up Your Home Photography Studio
For those getting into studio photography, the lighting will be slightly different. You can of course use speedlights, but they might not offer you the power you need. Studio setups often have many different types of lights. You are likely to find softboxes, rim lights, barn doors, grids, and strobe machines. They all have their purpose. Our main tip is to start small. Obtain the equipment that you know you are going to use and add to it slowly. For all other tips on what to look for, go through our article here.
Types of Artificial Studio Lights – Fluorescent, Strobe, LED or Tungsten?
There are many different types of artificial studio lights available. Every light, whether Strobe, LED, Tungsten or Fluorescent have different purposes. On top of this, you’ll notice that each light adds a different colour cast to your subject. For example, LED lights last a long time and rarely need replacing. Yet, their strength is sub-par when compared to strobe. Our article here gives you all the advice and tips on what you can expect from each type.
The Essential Photography Studio Equipment List
If you are looking to start or expand your studio, we have the best article for you. It might be the guide you’ve been looking for. Whether you are starting in your home, or are creating a dedicated space, there are certain things you’ll need. Backdrops and support systems help create the environment you want. The correct lights let you capture your subjects in the best possible light. Read through our guide here. You’ll find great tips on what you’ll need for any situation.
10 Tips for Making a DIY Photo Studio
Setting up a studio doesn’t have to be expensive. There are many things that you can create yourself. It feels better knowing you saved money by making it by hand. Softboxes and diffusers can be easily made at home. Backdrops are best made at home, as you are free to create something specific. Check out the tips on making a DIY photo studio here.
Speedlight vs.Strobe (What Photography Lighting Tool is Best?)
A Speedlight is a small, mobile flash system. these are perfect for situations away from a studio or indoor location. Most photographers use these ‘on-the-road’. Strobe lights are bigger flash units. These aren’t as mobile as speedlights, and they can’t sit on top of your camera. Read our article here on which one is best for you and your photography work.
How to Use Light Reflectors
Studio lighting can become very expensive, especially if you don’t know what you are doing. There are ways around most of the equipment that you think you need. The main light in a studio setting is a key light, the second being the fill, as it fills in the shadows left by the key. A fill light can be a separate light, but why spend the extra money? A reflective surface in the form of white foam boards or a dedicated reflector works perfectly. Read here on how you can use a reflector instead of fill light.
Getting the Most From Your Modifiers
A modifier is best described as an add-on to your studio lighting system. Studio lights are very plain tools until you add modifiers. With these add-ons, you can diffuse the light, you can turn it into a very strong and intense spot for very precise lighting. Any number of different lighting situations can come from a handful of these modifiers. Read the article here on the different range and availability of these modifiers, and how to use them.
How To Use a Softbox for Photography Lighting
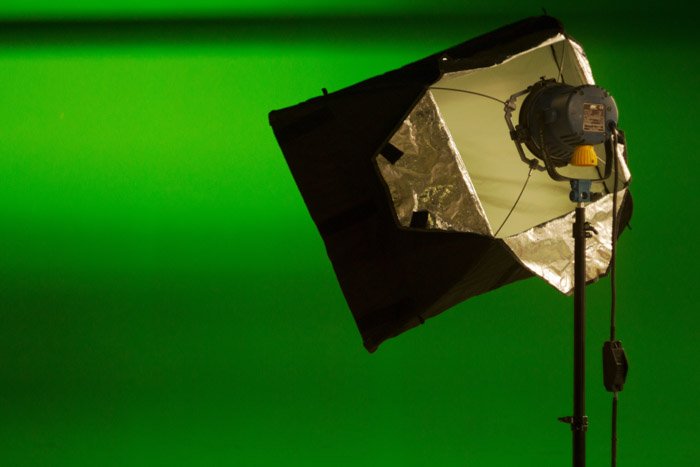
A softbox is a very handy lighting situation for studio photography. This is a studio strobe light with a reflective-lined opaque polyester or nylon. This lighting solution provides a softened light to reach your subject. Otherwise, you can expect a harsh illumination. A softbox should be the first thing you buy after obtaining a studio light. They’ll help your subjects appear more natural.
Portrait Phtography Lighting
How to Use Window Light for Portraits
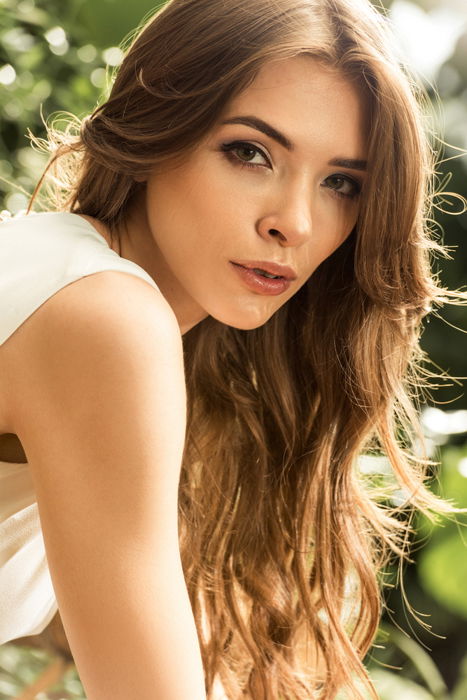
Window light is a great way to add light to your subject. Not only is it free to use, but you can also harness it in many ways. A diffuser can make it softer, and used with a reflector can create extra fill light. Just make sure you use it at the right time of day. The one thing you’ll need to consider is using it alongside artificial lighting. Natural light tends to be warmer, so use an additional warm light source. If you don’t, you’ll notice challenges when trying to colour correct it through white balance.
How To Use Ambient Lighting For Atmospheric Portraits
Ambient lighting allows you to capture atmospheric portraits. When we talk about this style of lighting, it is usually associated with natural light. This is something that can’t be easily controlled. But, it can be manipulated using props, tools or flags. Learn how to make your own atmospheric portraits here. You just need a little of your time and creativity.
Portrait Lighting Patterns and Tips
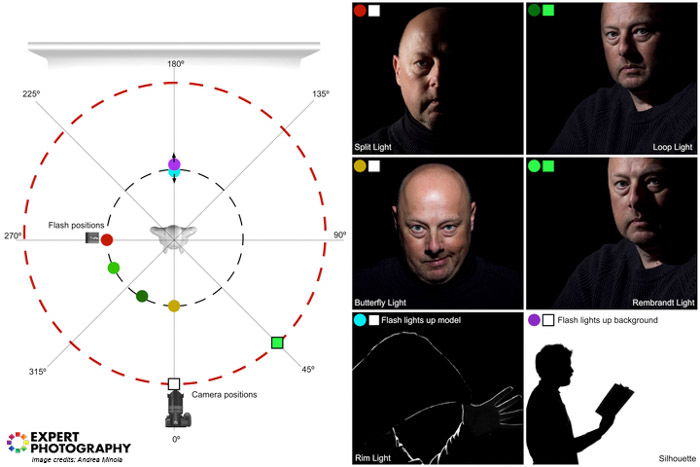
This is the fun part of fashion photography. And the most labour and research-intensive one. This guide is here to help you understand what lights will have what effect on your subject. Some photographs are lit very simply. Others can have up to and including 6 different lights to light the background, the hair, the face, etc. They always start with one light and work up to the multiple lighting setups. It is always beneficial for them to test effects as they go.
Which are the Most Important Portrait Photography Lighting Terms
Ever wondered what a backlight or a side lighting is? Or how a gel affects a scene? You have come to the right place. Here is a glossary of all the important photography lighting terms you will need.
Boudoir Photography Lighting
This helpful article goes through five of the best lighting patterns to use for Boudoir photography. Either by using natural light, applying studio lights or a mixture of both. Natural light is one of the most flattering forms of light. It is also easy to use. Using one studio light and a backdrop, also known as a colorama, is also a very simple choice. The light should be just off of the camera, as it will give you complimentary shadows. If you place the light slightly above the model, then the light will drop off. This is great for a transition on parts of the body that leaves the frame.
How to Create Dramatic Lighting in Portrait Photography
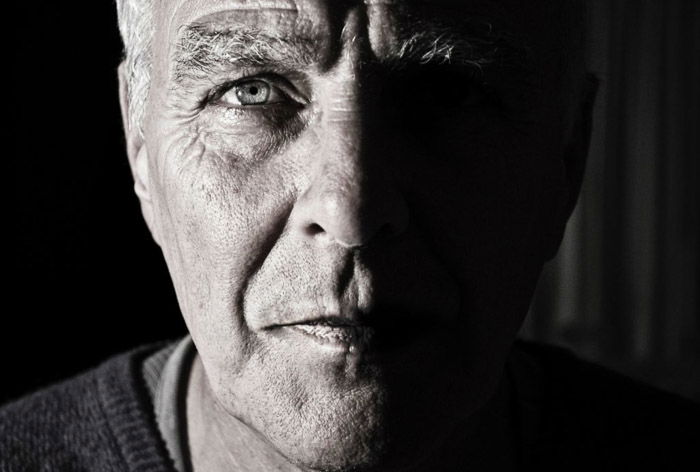
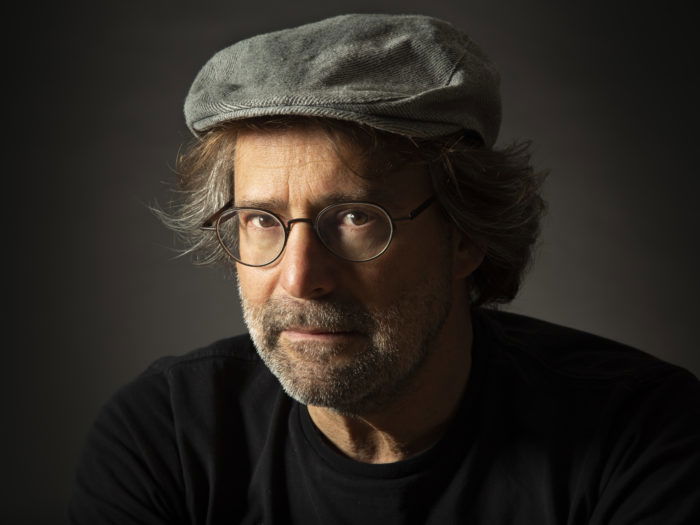
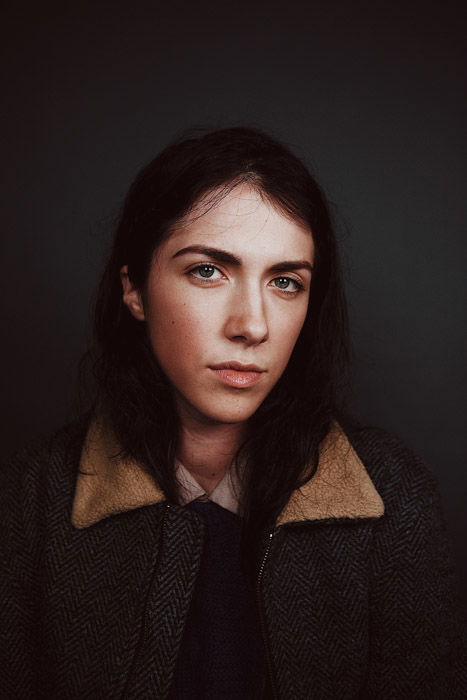
Soft lighting can be great for professional headshots. But, it isn’t great at adding that dramatic look you might be searching for. Dramatic lighting adds mood, tension, and interest. Some of your portraits will call for this style. Look at adding contrast through a harsh or strong light. Shadows are a great way to add that dramatic feeling too. For other advice on how to add dramatic lighting, read our article here.
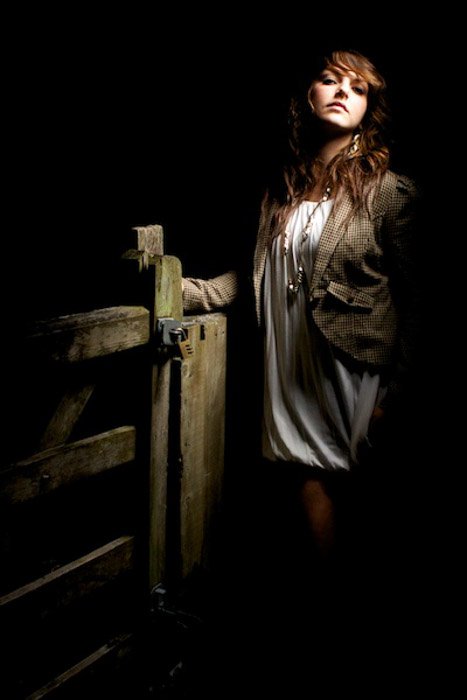
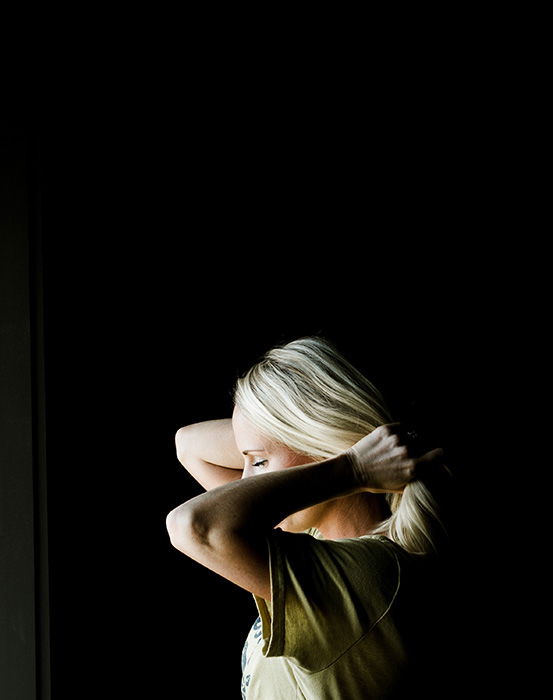
How to Use Low Key Lighting for Dramatic Photography
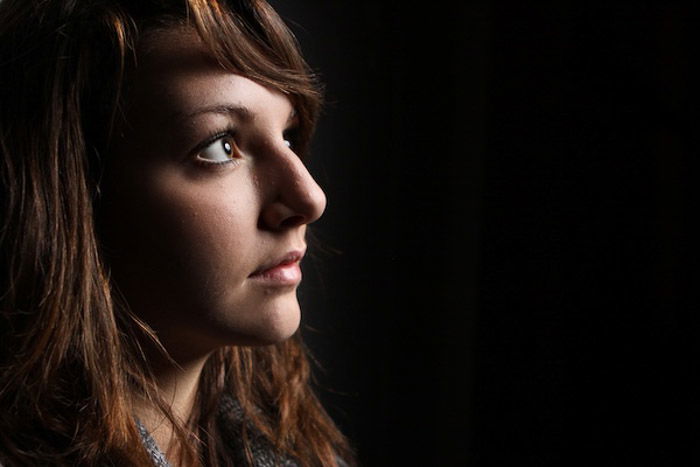
Low key lighting is in opposition to high key lighting. Here, you focus on keeping the majority of the scene dark, while only illuminating the subject. This style is best achieved with a light source that can be manipulated and controlled. The use of snoots, flash modifiers and flats are very important. Everything you need to know about low key lighting is here, in our article.
How to Use Butterfly Lighting for Portraits
Butterfly lighting is achieved from using one light source, usually an artificial light, such as a speedlight. The name is derived by the shape of the shadow that falls under the subjects’ nose. As the light is placed directly above the camera, facing downwards at a 45° angle, it leaves a slightly shaded area. This style is one of the main five types of lighting for portrait photography. Learn about it and add it to your repertoire.
Rembrandt Lighting Photography (What It Is and How to Use It)
Rembrandt was a Baroque style painter from the Netherlands, who focused on landscapes and portraits. His use of Chiaroscuro lighting was prominent, representing a dark mood through contrasts between light and dark areas. By following the lighting techniques he employed, you can create very bold portrait images. It has the possibility of adding that powerfulness your images are calling for.
How To Use Clamshell Photography Lighting
Rather than using one light to illuminate the face, you can use two. This way you help to eliminate and minimalize shadows. This is a lighting technique that can be used by speedlights and/or studio strobes. Even reflectors alongside beauty dishes work well. For all information surrounding photography lighting style, read our article here.
How to Use Low Key Lighting
This is a very minimal lighting setup where the majority of the image is black. This is relatively easy to do if you have a lot of light. The purpose is to highlight a specific area of the model where the viewer will place their focus. The ambient light should be as low as possible. There should be no light other than the flash or ‘strobe’ unit you are working with. Read through our article here before you go and start experimenting.
How to Use Beauty Dishes
Beauty dishes are a standard form of photography lighting in fashion image capturing. They are also inexpensive. They work either wired or wirelessly, depending on the system you prefer. Each beauty dish works in two ways, either with or without the grid. These can add dramatic lighting to a scene where a softbox or umbrella spreads the light out more. Read more about the dishes here and how they can benefit your work.
How to Use Short and Broad Lighting in Portrait Photography
There are many different ways you can use light to capture your portraits. They are usually connected to the shadows the lights leave behind on the subject’s face. Short and broad lighting are common ways to light a subject. They can be used to add interest, contrast or highlight a specific part of the person’s face. A broad light allows the lighter part of someone’s face to be closest to the camera. Short lighting setups concentrate more on the shadows that form. For all the information you need on these lighting styles, read our article here.
How to Use a Rim Light for More Powerful Portrait Photography
Rim lighting lets you focus detail around the edge of a subject. It usually relates to a person’s head, yet it can be used for the entire body. To use this type of lighting scenario, you might need more than one light. The idea is to better separate your subject from the background. Not only does it help to stop the two elements from converging, but it also adds depth to your image. An aesthetic image is more pleasing to the eye.
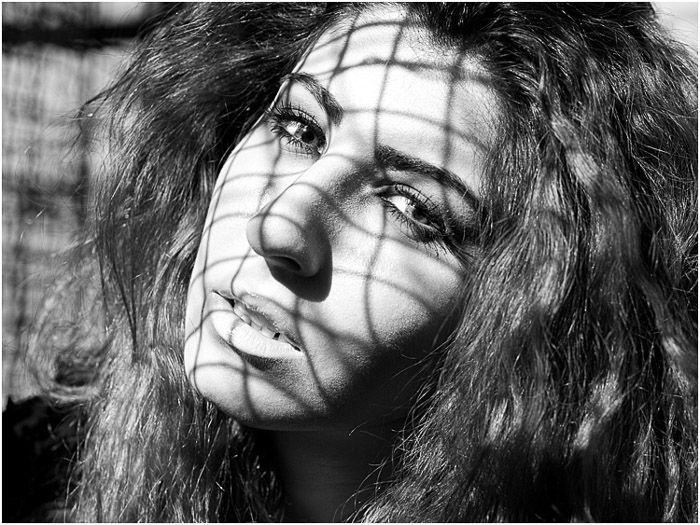
Photographing in Dappled Light
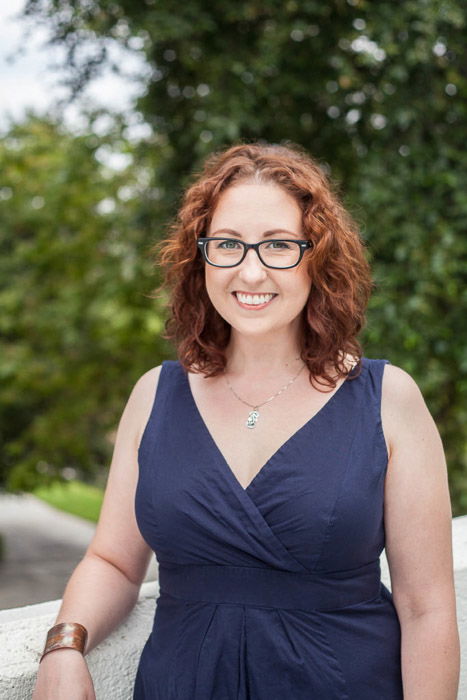
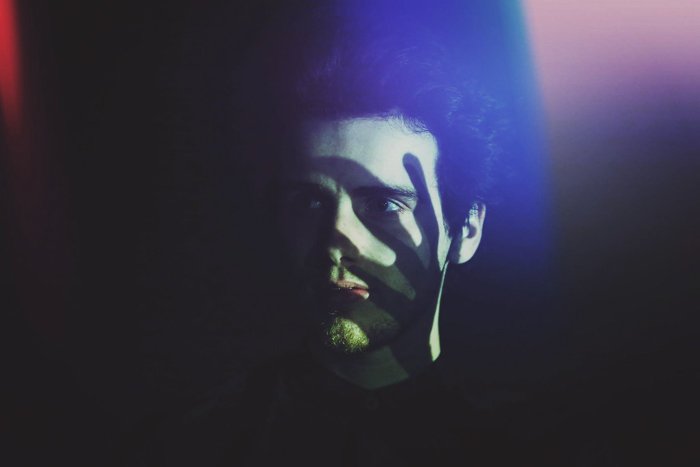
Dappled light is the perfect addition to portrait photography. Not only does it add interest, but it completely changes the mood and meaning of the image. There are many ways you can achieve this lighting effect. It is easier than you think. With a little forethought and planning, you can create some dramatic portraits. By utilizing nature, or creating something from scratch, you’ll be able to play around with shadows and highlights. It might just be the best thing you ever tried.
12 Tips for Natural Light Portraits: From Dull Photos To Dreamy Portraits
Photography is full of ‘How did they do that?’ Rarely can you find the details you need without joining an online course. The one area that can become complicated is lighting for portraiture. There are probably more possible lighting systems than there are stars in the sky. Having the recipes for these complicated systems will help create some of the best systems for creating stunning images. Read the article on all the recipes you will need to start capturing perfectly lit portraiture.
Avoid These 8 Common Photography Lighting Mistakes
Mistakes happen so that you learn from them and expand your photography lighting repertoire. You do need to know where you are going wrong so that you can learn how to create better lighting systems. One common mistake is having the fill light in the wrong position, or at the wrong power setting. This can cause double catchlights in the eyes, or create an image where you can’t distinguish between key or fill light. Read here on how to correct this photography lighting mistake and other six common ones.
10 Tips For Environmental Portrait Photography Lighting
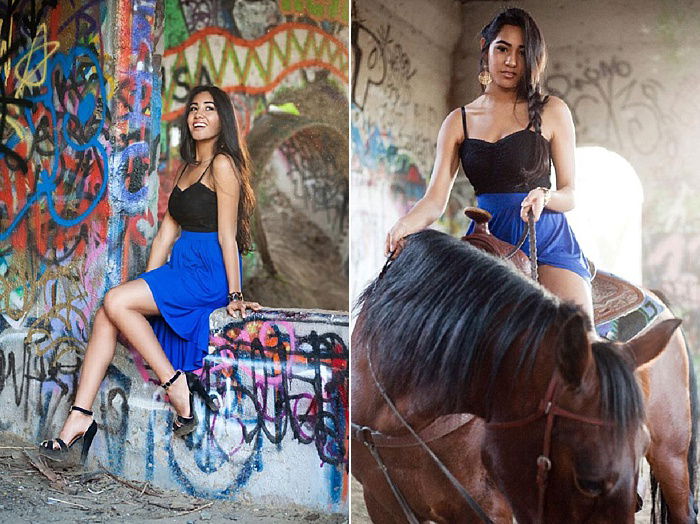
Photographing someone in a studio definitely has its advantages. You get to control every aspect, from backdrops and settings to all possible lighting patterns. Environmental portraits are a little more challenging. You need to source a location, think about clothes, colours and the lighting situation. Thankfully we took the time to create 10 of the best tips. They will help you get the best out of your photography.
10 Stunning Portrait Lighting Patterns Using Just One Light
You might see scores of tutorials telling you how to take a ‘correct’ portrait. They involve many lights through complex lighting setups. But, what you don’t see is you can take stunning portraits with one light. It’s all down to the look you want to achieve. Read here on how to use one light for perfect portraits. It will save you time, money and energy.
How To Shoot Atmospheric Night Portrait Photography
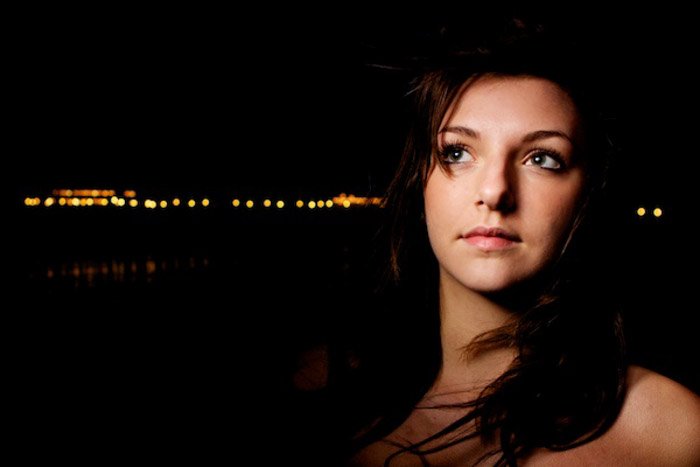
Portraits aren’t just for day time. they can be great at night time too. This is especially true if you are looking for atmospheric shots. Here, you’ll be dealing with low light conditions. Apart from a fast lens, it needs a little knowledge of your camera. The rest is down to your creativity. Lighting the scene can be tricky. You can either add your own through external flash units or use the ambient light. Either way, you’re in for cinematic results.
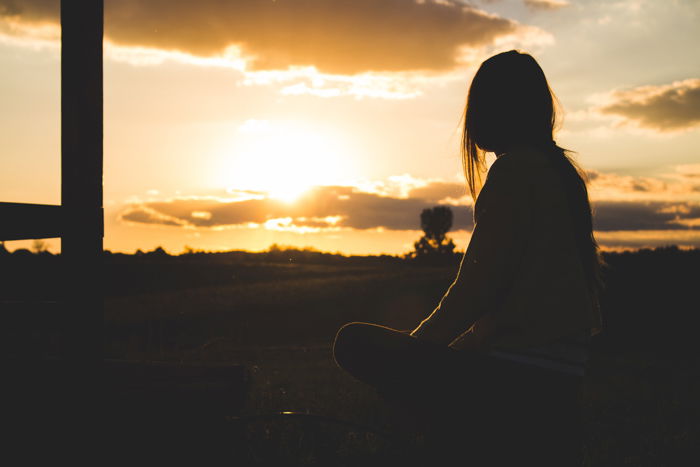
How to Shoot Spectacular Silhouette Photography
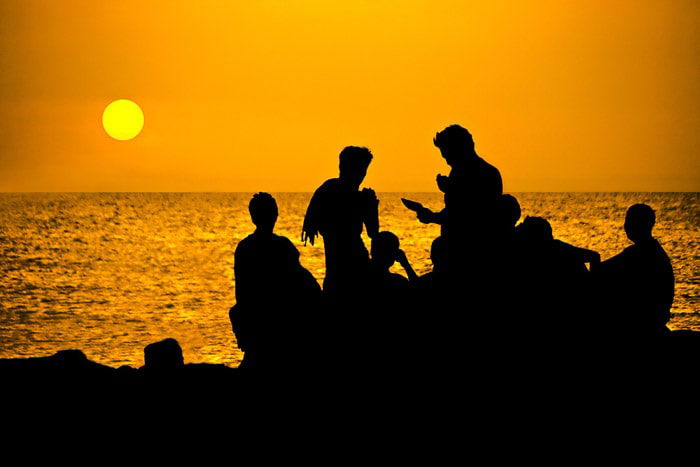
Light does always have to light your subject for perfect exposure. Some scenes will undoubtedly call for silhouettes. This can be done for many reasons. If you are more interested in showing shapes and forms, for example. Perhaps you want to keep the identity of the people hidden. Silhouettes can add an interesting mood or feeling to a scene. You’ll want to try it today after reading our article.
Product Photography Lighting
Natural Light in Product Photography
Natural light is great for product shots, it is abundant, constant and free to use. A diffuser is needed to soften the light to allow it to fall upon the product evenly. Reflectors create ‘fill light’ by bouncing the light back into the image. It can be difficult to harness and control. You can learn to do so with a material, such as a white curtain. This softens the sun’s brightness. Flags, which stop light, can keep sunlight from reaching certain parts of the product.
Product Photography Studio Lighting Set-Up
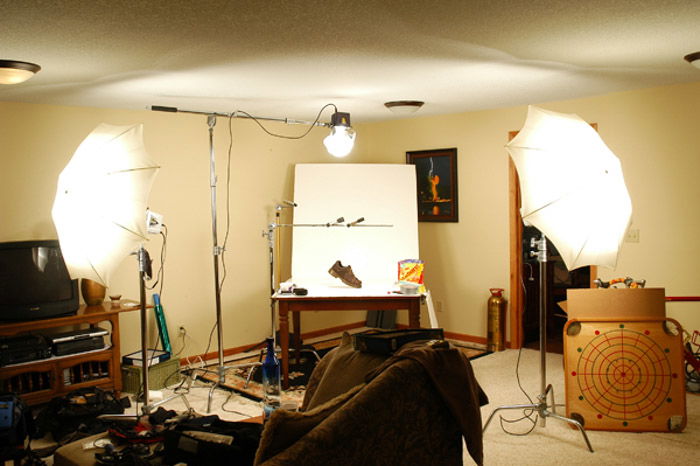
A studio is a great way to photograph a product as you have complete control over the setting and the light. This is by far the most expensive option as you will need to buy all the equipment yourself. An alternative could be that you rent the studio, and have access to all the equipment. This may be cheaper, but still not cheap. Creating a portable studio with a few lights is a viable option to keep costs down. This would allow you to pack the equipment away and take it along for an on-location photoshoot. Read this article for a great guide to studio lighting for product photography.
Wedding Photography Lighting
12 Wedding Photography Lighting Tips (From Natural Light to Flash)
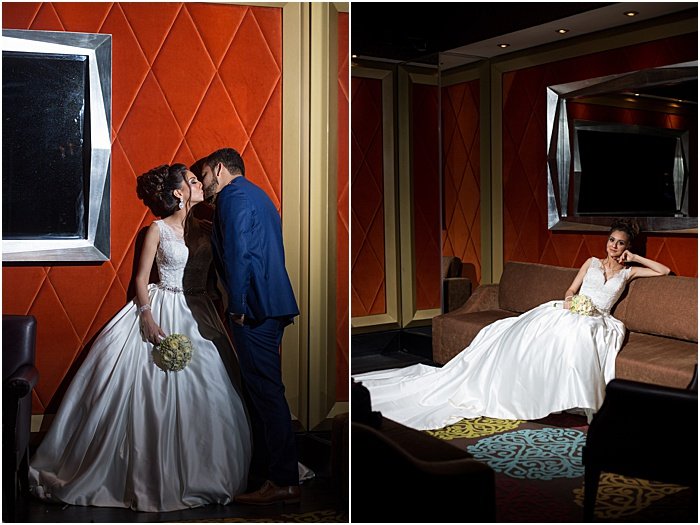
This extensive article looks at lighting an entire wedding. Going from the dressing room to the end of the night reception. Many different locations are throwing different temperatures at you. Wedding photography lighting will need some thought. The best way is to scout beforehand, looking for light and settings to capture powerful images. Natural light is a great way to illuminate your subject without too much gear. Windows are very handy as they add a soft, spread out feel. This light will also be abundant with the outside shots, where you might want to use reflectors. Speedlites will help fill in dark areas, and freeze motion when people are dancing. Utilize the light, and add to it where necessary.
Using Flash for Wedding Photography
A flash is a great tool for indoor event photography. It might even be a necessity, especially if the ambient light inside isn’t strong enough. Wedding photography is one area where a flash is needed. Many parts of the day are going to be inside, for example changing rooms, churches, registry offices, and dining halls. Having that flash, even as a fill light, helps to keep the ISO down. A low ISO means the quality of your images stays at a reasonable level.
How To Use an Off-Camera Flash
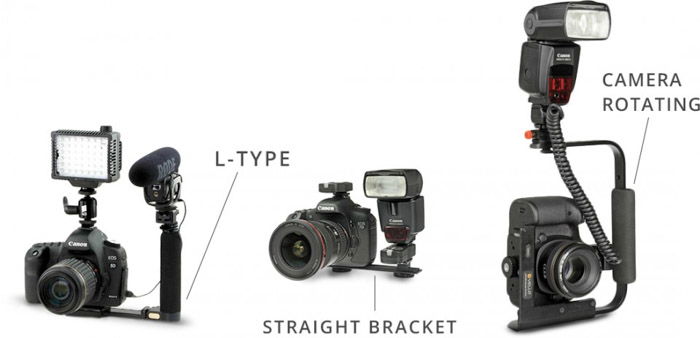
Off-camera flash lighting is a great help to your wedding photography. They can work with a Through-The-Lens (TTL) metering system. The flash will expose the scene depending on the available light. This is a pretty smart way to add a touch of light, known as a fill when needed. They sit on your camera’s hot-shoe, on a camera bracket, or even handheld for fast adjustments. You can even sync many flash units at the same time. This is great for different lights hitting the same scene from different angles. Go through our article here for all the information you need.
Outdoor Photography Lighting
High and Low Key Wildlife Photography
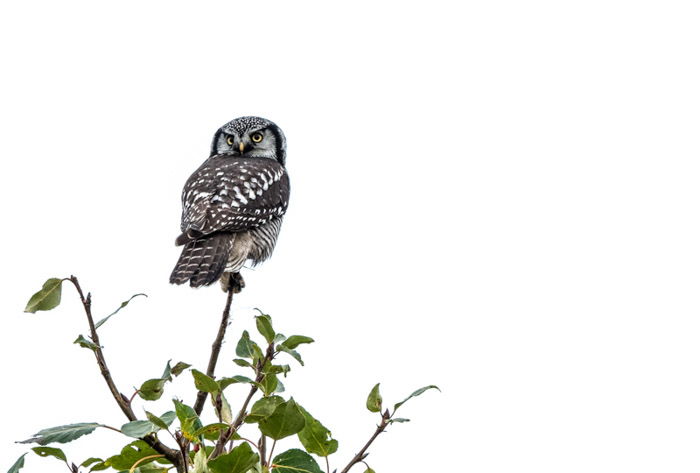
More often than not, we photographers try to stay away from overcast days. For portraiture, the overcast sky acts as a diffuser, softening the light. We tend to not include the sky in this manner as there is no detail present. The big, white empty space distracts the viewer from the intended subject. Yet, in wildlife photography, it can be quite refreshing. Read our extensive article here on how to can create these high key images.
How to Light Macro Subjects
Whether you are photographing food or insects, your image might benefit from some extra light. These can be in the form of natural light, used with a reflector or from an external unit like a flashgun or ring flash. This article shows you what is available and how to harness this added light to get the best out of your macro photography.
9 Great Tips for Taking Cloudy Day Photography
Cloudy day photography can add an interesting background to landscape or portrait photography. The defined shapes amidst a blue sky can really make an image pop. The other benefit here is the light you get. The clouds act as a natural light diffuser. This cuts any harsh light and gives it a softer touch. If you’re looking for a softly lit portrait, wait for the clouds.
How to Use Natural Light for Amazing Landscape Photography
Natural light is the perfect way to light any landscape scene. Different light comes at different times of the day. Seasons and weathers bring their own touches. These different temperatures and intensities of light only benefit your landscape photograph. They can add contrast, texture and colour casts. If you’re looking for ways on how to boost your landscape photography, utilize the natural light. It can make all the difference.
How to Shoot Street Photography in Any Light: From Rainy Days to Bright Sunshine
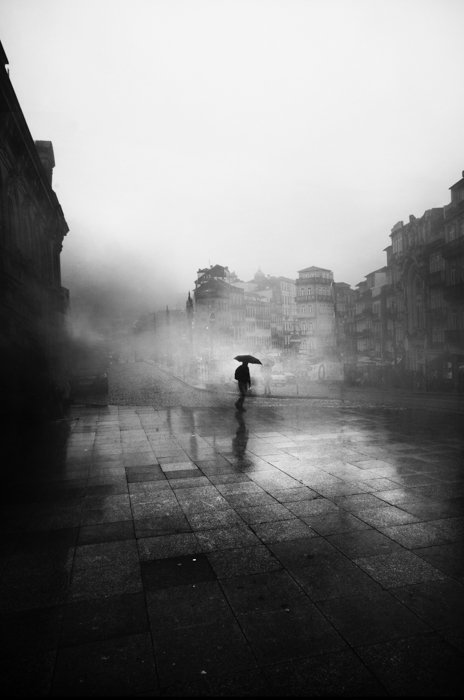
The weather can change at the drop of a hat. One of the areas that are affected by this is street photography. You may think that adverse weather would make for poor images. For portrait photography, you might be correct. Street photography can benefit greatly from sleet, snow or even angry clouds bringing rain. Our article tells you how to capture the street in any light.
How to Master Golden Hour Photography
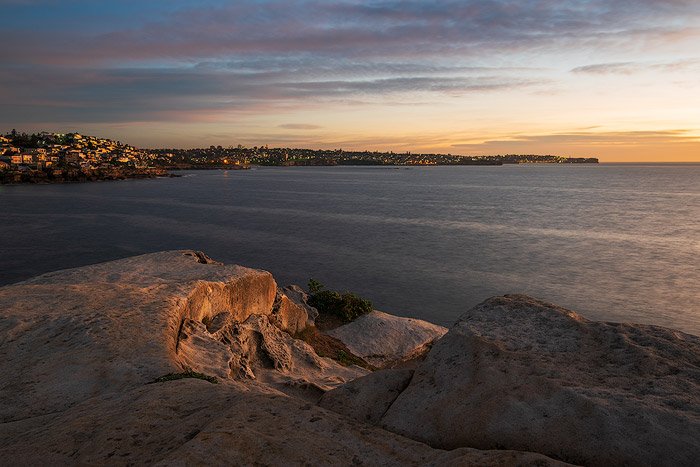
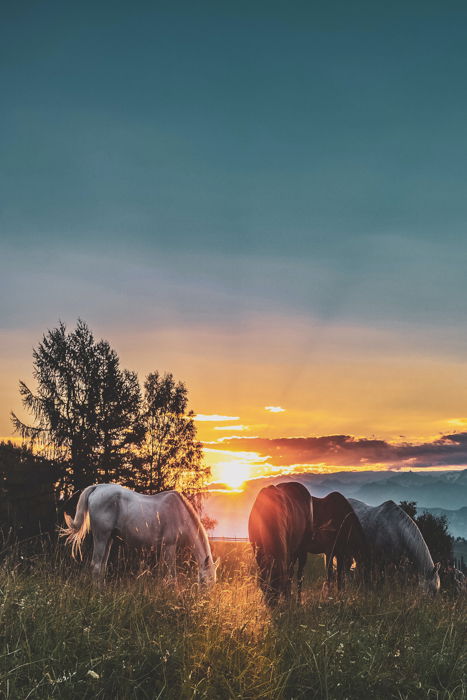
The golden hour is like catnip for landscape, architectural and portrait photographers. This is the hour just before the sun sets, and before the sun rises. It adds a beautiful, warm ambient light to the whole landscape. It isn’t as strong as direct light. This makes it easier to balance against shadows and low light areas. This is a great time to photograph silhouettes. The sky has beautiful, warm details exemplified by the counter-weighted shape doused in shadow. Read our extensive article here on why you will love shooting in the golden hour.
DIY Photography Lighting Tips
10 DIY Lighting Ideas
Lighting is always needed in low-light situations, or if you want to create an interesting effect. You’ll find them in studios most of the time, and they can cost a fortune. Luckily for you, we have collected the best ten ideas you can use to make your own, DIY photography style. Read our ideas here in our extensive article. You won’t need anything else.
Speedlite Modifiers
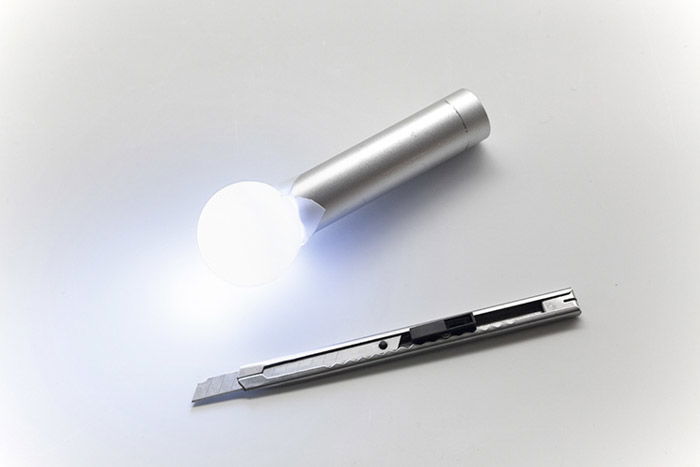
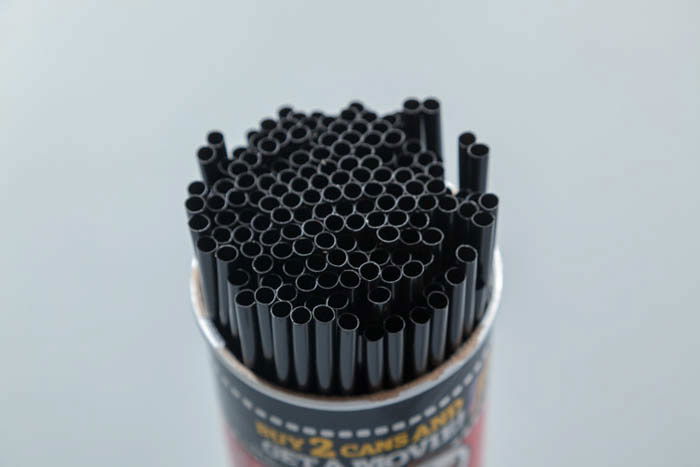
You might have seen the many different kinds and styles of lighting they have in professional studios. You might also have checked out how much they would all cost. They are very expensive, but all is not lost. You can create similar techniques for a fraction of the cost. All you need to start is a Speedlite. One simple way of making an intense beam of light is to use a Pringles can and some straws. Did I mention you need to be creative? Read our article here on how you can have fun while modifying your Speedlite.
How to Make a DIY Lightbox
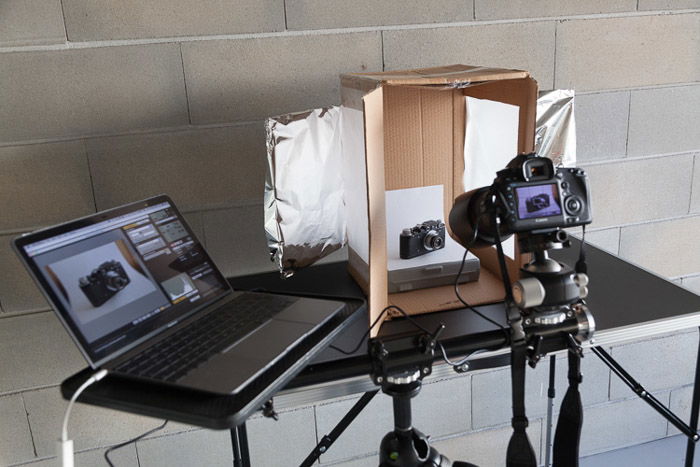
A lightbox is something you can make easily at home. Its purpose is to create a white space that allows that item to look as if it is floating in space. This box, coupled with a few lights will help you create a beautiful, constructive product photography setup. And it won’t cost you an arm and a leg either. Find out how to make one here and how it will benefit your DIY photography skills.
Creative Lighting Techniques
How to Use a Ring Flash for Creative Lighting
A ring flash is easily explained as a flash that comes in the form of a ring. This lighting solution fits around your lens, rather than sitting on your camera. This was first designed for dental photography. It allowed a complete blanket of light that created shadow-less images. Nowadays, photographers use them for close-up portraiture. If you ever wondered how it can be used for creative purposes, read our article here. It has everything you need.
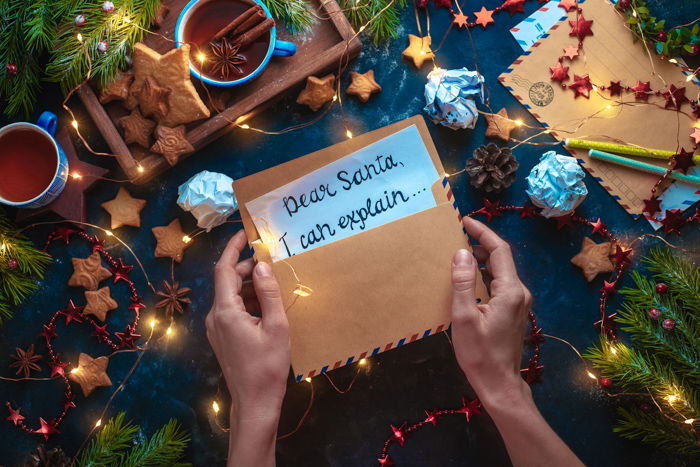
How To Get Creative With Fairy Light Photography
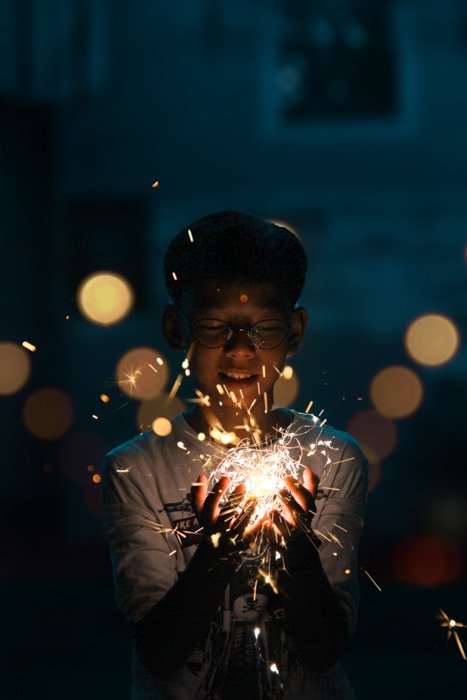
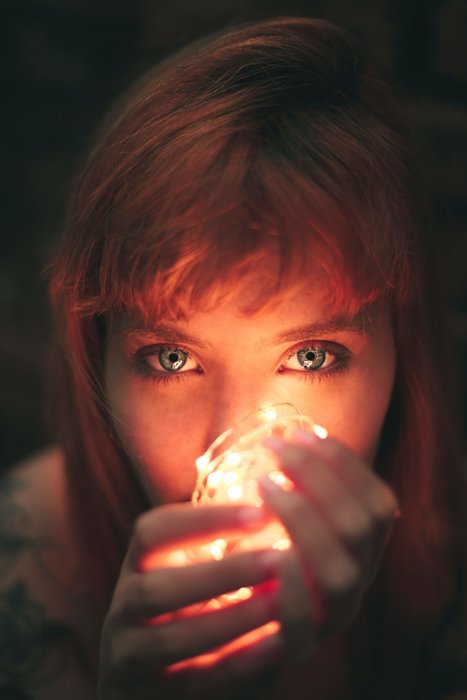
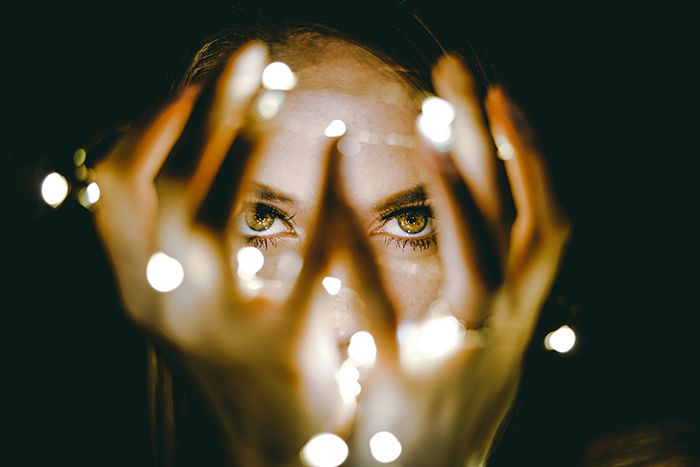
Fairy lights are a versatile way to light a subject. They add a minute amount of light, which can be placed very close to the subject you are capturing. What makes them so special is their size. The wire they sit on helps you attach, wrap or even curl around almost anything. You’ll also find they are perfect for bokeh purposes. Use them to add interest to the background, or a hint of interest in the foreground.
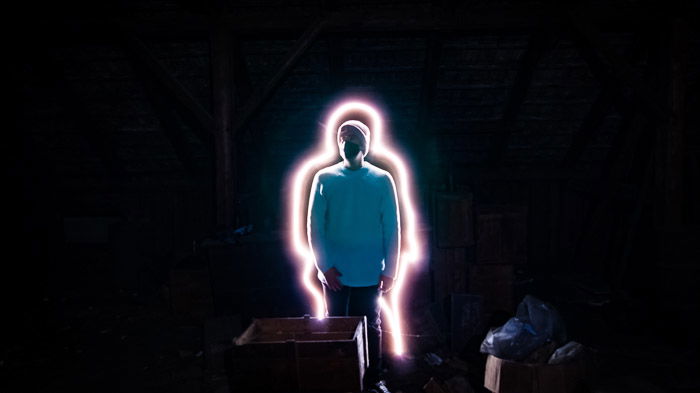
How to Create Impressive Light Graffiti
Impressive light graffiti comes from great planning. Having the appropriate lighting tools is only half of the battle. Unless you have a great location and something interesting to write, it is going to be a challenge. For all the tips and techniques you’ll need, read our article. This is a great starter for those interested in images that impress.
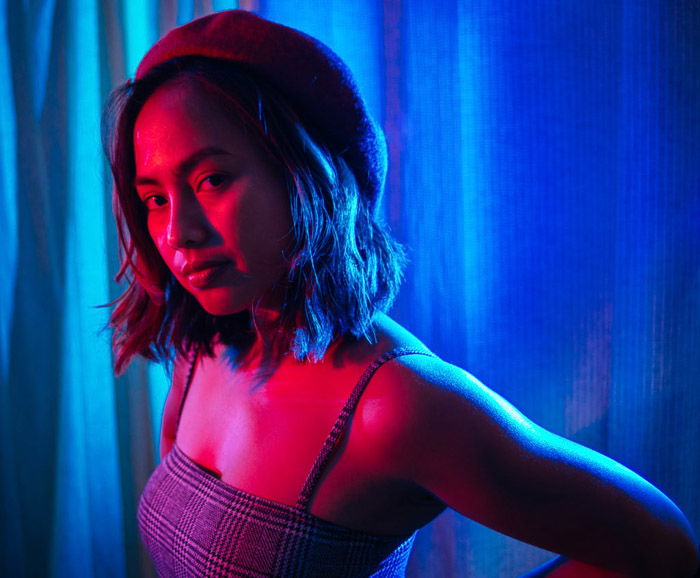
How to Take Awesome Color Gel Photography: 10 Ideas
If you’re looking for a more interesting and creative way to capture portraits, you’re in the right place. Colour gels are pieces of coloured cellophane that fit over your speedlight or strobe flash. They add a pop of colour where it would otherwise be white. They can be used in conjunction with other colours, adding depth. Let your creative side loose and use this article to create some memorable portraits.
How to Photograph Christmas Lights
Christmas lights or fairy lights are a great way to light a scene. They are versatile and usually, long enough to go anywhere you need them too. As this source consists of many tiny lights, they can be used in numerous different scenarios. Perfect for adding small amounts of detail that don’t steal the show. For tips on how to use them for product and food photography, read more here.
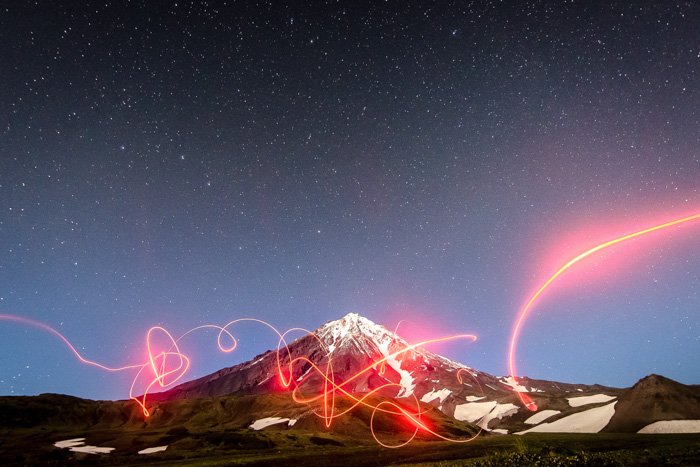
How LED Light Sticks Are Taking Light Painting Photography to a New Level
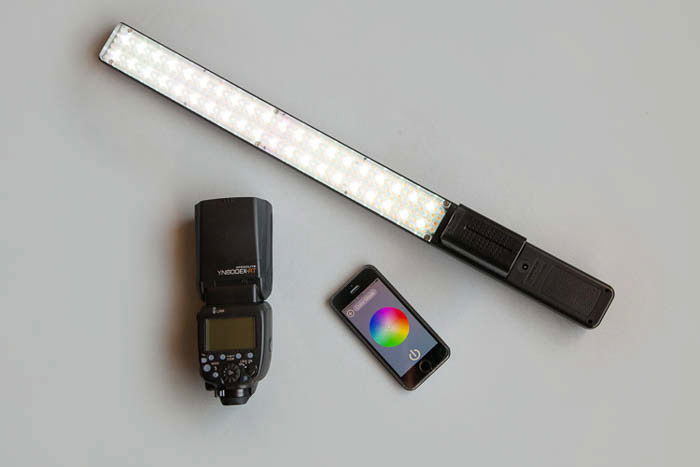
LED light sticks are a new way to light your subject and scene. They are mobile and versatile in what they can create. For light painting, LED light sticks are the way to go. Especially if you are looking to add interest to your background. All you need is an LED light stick, long exposure, and this article. Then you’re ready to go.
Adding Light During Post-Processing
How to Achieve Artistic Chiaroscuro Lighting in Photography
During photography, the stage is not the only time where you can incorporate light into your image. This can also be completed during the post-processing period, by using an editing software package such as Photoshop. One photography lighting technique that you may wish to incorporate is the chiaroscuro style, reminiscent of 1940’s noir films. This style adds interest and helps you turn a photograph into a story. It also helps to add depth to an image, making the ambience feel a little warmer.
How to Create Cool Lighting Effects in Photoshop
If you didn’t manage to capture the light while photographing, you can add it to the final stage of your image workflow. One style that can be added later in Photoshop is the graduated filter. This allows you to add light to specific parts of the image. By not applying the lighting style to the entire image, you keep the quality and the mood of the image. Read here on how you can use this to the benefit of your photography.
Conclusion
Whether you are new to photography or already have advanced skills, there is always something new to learn when it comes to photography lighting. The goal of this article is to help you with mastering different lighting techniques. We hope that you are on your way to capturing better images!


title: “The Ultimate Guide To Photography Lighting 83 Best Tips " ShowToc: true date: “2023-01-07” author: “Talisha Brown”
Read here how different kinds of lighting will help your photography.
What Do We Mean by Photography Lighting?
The word photography comes from the Greek roots φωτός (phōtos or phōs) “light”. Mixed with γραφή (graphé) it adds “representation using lines” or “drawing”. Altogether, it means “drawing with light”. Photography without light is like trying to write without ink, paint without paint and using your iPhone without battery. You can’t. As you can see, it’s not only important…it’s necessary. There are two ways to capture light using your camera. One is natural light, which is the most widely used because it’s already there. The sun gives it to us for free, so it would be silly not to take advantage. The other is artificial light, added to our scene from flash or continuous lighting. Ambient light is another term that you need to be aware of, and it can be natural or artificially present. By reading our extensive guide, you will learn how to fully utilize light in all its glory.
12 Photography Lighting Facts You Should Know
Knowing as much as you can about lighting will help you with your photography. It is a difficult area to master, but how the light hits your subject is very important. You can experiment with side lighting, backlighting, and many ways to soften harsh shadows. To get to know more about different lighting methods, read our article about 12 photography lighting facts.
Best Lighting Equipment To Get Started With
There are many different lighting systems available. A studio tends to have big, powerful units. It’s also usually plugged into the wall. Smaller versions, known as Speedlites, are portable and run off AA battery power. This thorough article gives you all the information you need to get started.
How to Easily Understand Colour Temperature
Having light hit your subject is paramount in being able to capture them. But there are many different types of light sources you can use. Every light source has a colour. This colour cast is added to any subject or object that the light hits. The closer the subject is to the light, the stronger the colour cast is. Have you have ever tried to capture an indoor scene, and felt it was too orange? This is the colour temperature of the light source, the light bulb in this case. For the most part, you can fix this in post-production. But you should aim to set a correct white balance in the camera. This article will give you all the information you’ll need.
Underexposure vs Overexposure: Everything You Need to Know
When photographing an outdoor scene, you’ll often encounter a mix of light strength. For example, capturing a building and the sky on a sunny day. If you use the light meter reading for the building, the sky will overexpose. This means it will lose all of its details. Similarly, if you use the light meter reading from the sky, the building will be too dark. This underexposing makes it difficult to see the present details. Here, the sky is about 2-3 stops lighter than the building. There are ways to correct this problem, all of which you can find in our article.
How to Use a Slow Sync Flash
There will be many times where you’ll want to capture more ambient light in a scene. Photographing indoors means low light, and slow shutter speed is necessary. But as you use slow shutter speed, everything becomes blurry. This is down to camera shake. The shutter is open long enough to capture the slightest movement. This is where slow sync comes in. A slow shutter speed adds more light, and the flash freezes the subject. This eliminates the shake and blur. Read our article here on how and when to use it.
How to Photograph Fast Action in Low Light
Low light is always a challenge for photographers, as we often need to trade quality for exposure. Action photography and low light are like bickering siblings. They don’t go hand in hand, as the settings for both scenarios clash. Focusing on the light will present the blur, and obtaining the action means an underexposed image. Here, you will need aperture, ISO and shutter speed. Using these effectively helps capture enough light, keeping the quality of the image high. Read here on why your lenses are important for low light. And also how to use your camera for higher quality images.
How to Use a Light Meter for Better Photography
There was a time where if you didn’t use a light meter in your photography, you would have to make an educated guess in capturing the correct exposure. Fashion and portrait photography were the main users of these meters, working with complex lighting systems. Now, all our cameras have an inbuilt light meter, helping you capture the right amount of light. Read here on why you need a light meter, and which of the two different ways would suit you better.
How to Choose (and Use!) Hard Light vs Soft Light
There are times when you are looking for soft light. For example, capturing a bride as she is dressing for the big day. At other times, hard light is needed. Especially if you are looking for contrast in your scene. Our article runs through how to create and take advantage of these two lighting styles.
How To Effectively Use Backlight in Photography
Backlighting your subjects gives you more of the background in your shot. Instead of hiding it, you let it shine, boosting your subject in the front. By adding light in the background, you create an airy and warm scenario. It isn’t as moody as a full-frontal light situation. This lighting technique also allows you to create silhouettes.
The Easy Guide to Shooting High Key Photography
If your scene is giving your camera a lot of light, you might consider high-key photography. The high-key refers to the excessive use of lights and lighting in the image. This is a technique you would use for product photography. It allows you to remove most if not all detail from the background. It can also come in handy for creating artistic portraits For all high-key photography questions, tips and techniques, read our article here.
Natural Light Photography
How to Take Control of Natural Light with Photography
Most photographers love natural light. It is free, it’s abundant and easy to work with. To harness the full power, you will need to diffuse or even flag the light. One recommendation is to know how you can use your reflectors effectively. By bending and warping the reflector, you can change how the light hits the subject. By making it concave, you help to intensify the light and create a spotlight, rather than a soft lighting effect. You can also make your own DIY reflector easily at home. Check out our article to learn more about making use of natural light.
What’s The Best Time to Take Natural Light Photos Outside?
Natural light has many advantages. It’s free, abundant as is right with you where ever you go. At midday, the sun is at it’s strongest, no matter where you are. At other times of the day, natural light changes. The golden hour is the period of daytime shortly after sunrise or before sunset. This gives your scene a ‘golden’ warmth to it. The time of the year also denotes how the light plays with your subject. Our article here has all the tips and information about the best time to take natural light photos.
Flash Lighting
When You Should and Should NOT use a Flash
When to use a flash is one of the most asked questions regarding photography. Some photographers steer clear from it, as they want to remain candid shooters. A flash can add a significant change to your images, day and night. You can use it as a main light or even a fill to an otherwise well-lit scene. There are times when a flash is a big no-no. Some events or concert photography makes using a flash impossible. Read our article on all the information you need. To flash or not, that is the question.
How to Use a Wireless Flash Trigger
A wireless flash trigger lets you control an off-camera flash. Here, the speedlight flash connects to a wireless hot-shoe which connects to a transmitter. This sits on your camera’s hot-shoe. The signal is sent wirelessly, allowing you to place your flash anywhere. Perfect for scenes where a flash on your camera is detrimental. It is a very simple device to use, as long as you get the right one. We have all your questions answered here.
What Is a TTL Flash? (TTL vs Manual Flash Modes)
A TTL (Through the Lens) flash uses your cameras on-board metering system. This allows the flash to intelligently ‘judge’ how much light to pump into the scene. This can be a hit or miss, as it depends on your scene and metering mode used. For example, spot metering mode forces the flash to add enough light just for that single point. When using evaluative, the flash will add enough light to bring up the exposure of all objects. This can lead to over-exposure and loss of details. Perfect for high-key photography lighting though. If you’re stuck between TTL and manual flash modes, we have the article for you.
Best Tips For Bounce Flash Photography
A bounce flash is a great way to light a subject, especially if you’re looking for a soft-lighting exposure. Harsh light isn’t the best fit for all types of photography. Perhaps the subject in front of your camera has a light colour range. With bounce flash, you retain the details within it. How do you bounce the light? As your speedlight or flash utilizes a swivel head, it can be turned many ways. This allows you to point the light source to walls, ceilings, and reflectors. Harness the power of the bounce flash here. It might be the trick you’ve been looking for.
How to Use Fill Flash
Undoubtedly, we will deal with situations where the scene will have varying degrees of exposure. The background might be lighter than your subject. Here, a reflector can bounce a little more light back into the shaded areas. For a stronger light source, consider using a flash. By adding a little light from a flash, you can bring out the details that fall into shadow. This light is known as a fill flash. This is a very handy photography lighting trick, especially for situational portraits.
Best Flash for Nikon DSLR Camera
All flashes are equal, but some flashes are more equal than others. Believe it or not, every flash or speedlight utilizes different settings that can help your photography. So which one should you use? We take into account five of the best flashes available. If you own a Nikon camera, the answers are here.
Food Photography
How To Improve Your Food Photography With Natural Light
Using natural light might be the best way to start and practice with. It is abundant, free and everyone has a window they can use as their source. It is also available outside for shoots, for example, in a park or on-location. Here, a diffuser sits between the window and the food. This creates an even light fall and to take away the intensity of the light source. Reflectors can be used to help bounce the light back towards the subject, softening harsh shadows. By no means is it easy, but it is by far the cheapest option that works any time of the day.
One Light Set-Up for Food Photography
Rather than using natural light, a softbox is a great option. Great for studios with no windows, or times when the sun isn’t as strong as you want it to be. The softboxes are pretty inexpensive, easy to put up and pack away. It is a viable choice. Using one light will leave you one set of shadows. Combining the light source with reflectors help to minimalize these harsh areas. This helps pull out the detail and gives a constant flow of light This tool is easily moved for different angles, and it also dims or intensifies the light.
Studio Lighting
Tips for Setting Up Your Home Photography Studio
For those getting into studio photography, the lighting will be slightly different. You can of course use speedlights, but they might not offer you the power you need. Studio setups often have many different types of lights. You are likely to find softboxes, rim lights, barn doors, grids, and strobe machines. They all have their purpose. Our main tip is to start small. Obtain the equipment that you know you are going to use and add to it slowly. For all other tips on what to look for, go through our article here.
Types of Artificial Studio Lights – Fluorescent, Strobe, LED or Tungsten?
There are many different types of artificial studio lights available. Every light, whether Strobe, LED, Tungsten or Fluorescent have different purposes. On top of this, you’ll notice that each light adds a different colour cast to your subject. For example, LED lights last a long time and rarely need replacing. Yet, their strength is sub-par when compared to strobe. Our article here gives you all the advice and tips on what you can expect from each type.
The Essential Photography Studio Equipment List
If you are looking to start or expand your studio, we have the best article for you. It might be the guide you’ve been looking for. Whether you are starting in your home, or are creating a dedicated space, there are certain things you’ll need. Backdrops and support systems help create the environment you want. The correct lights let you capture your subjects in the best possible light. Read through our guide here. You’ll find great tips on what you’ll need for any situation.
10 Tips for Making a DIY Photo Studio
Setting up a studio doesn’t have to be expensive. There are many things that you can create yourself. It feels better knowing you saved money by making it by hand. Softboxes and diffusers can be easily made at home. Backdrops are best made at home, as you are free to create something specific. Check out the tips on making a DIY photo studio here.
Speedlight vs.Strobe (What Photography Lighting Tool is Best?)
A Speedlight is a small, mobile flash system. these are perfect for situations away from a studio or indoor location. Most photographers use these ‘on-the-road’. Strobe lights are bigger flash units. These aren’t as mobile as speedlights, and they can’t sit on top of your camera. Read our article here on which one is best for you and your photography work.
How to Use Light Reflectors
Studio lighting can become very expensive, especially if you don’t know what you are doing. There are ways around most of the equipment that you think you need. The main light in a studio setting is a key light, the second being the fill, as it fills in the shadows left by the key. A fill light can be a separate light, but why spend the extra money? A reflective surface in the form of white foam boards or a dedicated reflector works perfectly. Read here on how you can use a reflector instead of fill light.
Getting the Most From Your Modifiers
A modifier is best described as an add-on to your studio lighting system. Studio lights are very plain tools until you add modifiers. With these add-ons, you can diffuse the light, you can turn it into a very strong and intense spot for very precise lighting. Any number of different lighting situations can come from a handful of these modifiers. Read the article here on the different range and availability of these modifiers, and how to use them.
How To Use a Softbox for Photography Lighting
A softbox is a very handy lighting situation for studio photography. This is a studio strobe light with a reflective-lined opaque polyester or nylon. This lighting solution provides a softened light to reach your subject. Otherwise, you can expect a harsh illumination. A softbox should be the first thing you buy after obtaining a studio light. They’ll help your subjects appear more natural.
Portrait Phtography Lighting
How to Use Window Light for Portraits
Window light is a great way to add light to your subject. Not only is it free to use, but you can also harness it in many ways. A diffuser can make it softer, and used with a reflector can create extra fill light. Just make sure you use it at the right time of day. The one thing you’ll need to consider is using it alongside artificial lighting. Natural light tends to be warmer, so use an additional warm light source. If you don’t, you’ll notice challenges when trying to colour correct it through white balance.
How To Use Ambient Lighting For Atmospheric Portraits
Ambient lighting allows you to capture atmospheric portraits. When we talk about this style of lighting, it is usually associated with natural light. This is something that can’t be easily controlled. But, it can be manipulated using props, tools or flags. Learn how to make your own atmospheric portraits here. You just need a little of your time and creativity.
Portrait Lighting Patterns and Tips
This is the fun part of fashion photography. And the most labour and research-intensive one. This guide is here to help you understand what lights will have what effect on your subject. Some photographs are lit very simply. Others can have up to and including 6 different lights to light the background, the hair, the face, etc. They always start with one light and work up to the multiple lighting setups. It is always beneficial for them to test effects as they go.
Which are the Most Important Portrait Photography Lighting Terms
Ever wondered what a backlight or a side lighting is? Or how a gel affects a scene? You have come to the right place. Here is a glossary of all the important photography lighting terms you will need.
Boudoir Photography Lighting
This helpful article goes through five of the best lighting patterns to use for Boudoir photography. Either by using natural light, applying studio lights or a mixture of both. Natural light is one of the most flattering forms of light. It is also easy to use. Using one studio light and a backdrop, also known as a colorama, is also a very simple choice. The light should be just off of the camera, as it will give you complimentary shadows. If you place the light slightly above the model, then the light will drop off. This is great for a transition on parts of the body that leaves the frame.
How to Create Dramatic Lighting in Portrait Photography
Soft lighting can be great for professional headshots. But, it isn’t great at adding that dramatic look you might be searching for. Dramatic lighting adds mood, tension, and interest. Some of your portraits will call for this style. Look at adding contrast through a harsh or strong light. Shadows are a great way to add that dramatic feeling too. For other advice on how to add dramatic lighting, read our article here.
How to Use Low Key Lighting for Dramatic Photography
Low key lighting is in opposition to high key lighting. Here, you focus on keeping the majority of the scene dark, while only illuminating the subject. This style is best achieved with a light source that can be manipulated and controlled. The use of snoots, flash modifiers and flats are very important. Everything you need to know about low key lighting is here, in our article.
How to Use Butterfly Lighting for Portraits
Butterfly lighting is achieved from using one light source, usually an artificial light, such as a speedlight. The name is derived by the shape of the shadow that falls under the subjects’ nose. As the light is placed directly above the camera, facing downwards at a 45° angle, it leaves a slightly shaded area. This style is one of the main five types of lighting for portrait photography. Learn about it and add it to your repertoire.
Rembrandt Lighting Photography (What It Is and How to Use It)
Rembrandt was a Baroque style painter from the Netherlands, who focused on landscapes and portraits. His use of Chiaroscuro lighting was prominent, representing a dark mood through contrasts between light and dark areas. By following the lighting techniques he employed, you can create very bold portrait images. It has the possibility of adding that powerfulness your images are calling for.
How To Use Clamshell Photography Lighting
Rather than using one light to illuminate the face, you can use two. This way you help to eliminate and minimalize shadows. This is a lighting technique that can be used by speedlights and/or studio strobes. Even reflectors alongside beauty dishes work well. For all information surrounding photography lighting style, read our article here.
How to Use Low Key Lighting
This is a very minimal lighting setup where the majority of the image is black. This is relatively easy to do if you have a lot of light. The purpose is to highlight a specific area of the model where the viewer will place their focus. The ambient light should be as low as possible. There should be no light other than the flash or ‘strobe’ unit you are working with. Read through our article here before you go and start experimenting.
How to Use Beauty Dishes
Beauty dishes are a standard form of photography lighting in fashion image capturing. They are also inexpensive. They work either wired or wirelessly, depending on the system you prefer. Each beauty dish works in two ways, either with or without the grid. These can add dramatic lighting to a scene where a softbox or umbrella spreads the light out more. Read more about the dishes here and how they can benefit your work.
How to Use Short and Broad Lighting in Portrait Photography
There are many different ways you can use light to capture your portraits. They are usually connected to the shadows the lights leave behind on the subject’s face. Short and broad lighting are common ways to light a subject. They can be used to add interest, contrast or highlight a specific part of the person’s face. A broad light allows the lighter part of someone’s face to be closest to the camera. Short lighting setups concentrate more on the shadows that form. For all the information you need on these lighting styles, read our article here.
How to Use a Rim Light for More Powerful Portrait Photography
Rim lighting lets you focus detail around the edge of a subject. It usually relates to a person’s head, yet it can be used for the entire body. To use this type of lighting scenario, you might need more than one light. The idea is to better separate your subject from the background. Not only does it help to stop the two elements from converging, but it also adds depth to your image. An aesthetic image is more pleasing to the eye.
Photographing in Dappled Light
Dappled light is the perfect addition to portrait photography. Not only does it add interest, but it completely changes the mood and meaning of the image. There are many ways you can achieve this lighting effect. It is easier than you think. With a little forethought and planning, you can create some dramatic portraits. By utilizing nature, or creating something from scratch, you’ll be able to play around with shadows and highlights. It might just be the best thing you ever tried.
12 Tips for Natural Light Portraits: From Dull Photos To Dreamy Portraits
Photography is full of ‘How did they do that?’ Rarely can you find the details you need without joining an online course. The one area that can become complicated is lighting for portraiture. There are probably more possible lighting systems than there are stars in the sky. Having the recipes for these complicated systems will help create some of the best systems for creating stunning images. Read the article on all the recipes you will need to start capturing perfectly lit portraiture.
Avoid These 8 Common Photography Lighting Mistakes
Mistakes happen so that you learn from them and expand your photography lighting repertoire. You do need to know where you are going wrong so that you can learn how to create better lighting systems. One common mistake is having the fill light in the wrong position, or at the wrong power setting. This can cause double catchlights in the eyes, or create an image where you can’t distinguish between key or fill light. Read here on how to correct this photography lighting mistake and other six common ones.
10 Tips For Environmental Portrait Photography Lighting
Photographing someone in a studio definitely has its advantages. You get to control every aspect, from backdrops and settings to all possible lighting patterns. Environmental portraits are a little more challenging. You need to source a location, think about clothes, colours and the lighting situation. Thankfully we took the time to create 10 of the best tips. They will help you get the best out of your photography.
10 Stunning Portrait Lighting Patterns Using Just One Light
You might see scores of tutorials telling you how to take a ‘correct’ portrait. They involve many lights through complex lighting setups. But, what you don’t see is you can take stunning portraits with one light. It’s all down to the look you want to achieve. Read here on how to use one light for perfect portraits. It will save you time, money and energy.
How To Shoot Atmospheric Night Portrait Photography
Portraits aren’t just for day time. they can be great at night time too. This is especially true if you are looking for atmospheric shots. Here, you’ll be dealing with low light conditions. Apart from a fast lens, it needs a little knowledge of your camera. The rest is down to your creativity. Lighting the scene can be tricky. You can either add your own through external flash units or use the ambient light. Either way, you’re in for cinematic results.
How to Shoot Spectacular Silhouette Photography
Light does always have to light your subject for perfect exposure. Some scenes will undoubtedly call for silhouettes. This can be done for many reasons. If you are more interested in showing shapes and forms, for example. Perhaps you want to keep the identity of the people hidden. Silhouettes can add an interesting mood or feeling to a scene. You’ll want to try it today after reading our article.
Product Photography Lighting
Natural Light in Product Photography
Natural light is great for product shots, it is abundant, constant and free to use. A diffuser is needed to soften the light to allow it to fall upon the product evenly. Reflectors create ‘fill light’ by bouncing the light back into the image. It can be difficult to harness and control. You can learn to do so with a material, such as a white curtain. This softens the sun’s brightness. Flags, which stop light, can keep sunlight from reaching certain parts of the product.
Product Photography Studio Lighting Set-Up
A studio is a great way to photograph a product as you have complete control over the setting and the light. This is by far the most expensive option as you will need to buy all the equipment yourself. An alternative could be that you rent the studio, and have access to all the equipment. This may be cheaper, but still not cheap. Creating a portable studio with a few lights is a viable option to keep costs down. This would allow you to pack the equipment away and take it along for an on-location photoshoot. Read this article for a great guide to studio lighting for product photography.
Wedding Photography Lighting
12 Wedding Photography Lighting Tips (From Natural Light to Flash)
This extensive article looks at lighting an entire wedding. Going from the dressing room to the end of the night reception. Many different locations are throwing different temperatures at you. Wedding photography lighting will need some thought. The best way is to scout beforehand, looking for light and settings to capture powerful images. Natural light is a great way to illuminate your subject without too much gear. Windows are very handy as they add a soft, spread out feel. This light will also be abundant with the outside shots, where you might want to use reflectors. Speedlites will help fill in dark areas, and freeze motion when people are dancing. Utilize the light, and add to it where necessary.
Using Flash for Wedding Photography
A flash is a great tool for indoor event photography. It might even be a necessity, especially if the ambient light inside isn’t strong enough. Wedding photography is one area where a flash is needed. Many parts of the day are going to be inside, for example changing rooms, churches, registry offices, and dining halls. Having that flash, even as a fill light, helps to keep the ISO down. A low ISO means the quality of your images stays at a reasonable level.
How To Use an Off-Camera Flash
Off-camera flash lighting is a great help to your wedding photography. They can work with a Through-The-Lens (TTL) metering system. The flash will expose the scene depending on the available light. This is a pretty smart way to add a touch of light, known as a fill when needed. They sit on your camera’s hot-shoe, on a camera bracket, or even handheld for fast adjustments. You can even sync many flash units at the same time. This is great for different lights hitting the same scene from different angles. Go through our article here for all the information you need.
Outdoor Photography Lighting
High and Low Key Wildlife Photography
More often than not, we photographers try to stay away from overcast days. For portraiture, the overcast sky acts as a diffuser, softening the light. We tend to not include the sky in this manner as there is no detail present. The big, white empty space distracts the viewer from the intended subject. Yet, in wildlife photography, it can be quite refreshing. Read our extensive article here on how to can create these high key images.
How to Light Macro Subjects
Whether you are photographing food or insects, your image might benefit from some extra light. These can be in the form of natural light, used with a reflector or from an external unit like a flashgun or ring flash. This article shows you what is available and how to harness this added light to get the best out of your macro photography.
9 Great Tips for Taking Cloudy Day Photography
Cloudy day photography can add an interesting background to landscape or portrait photography. The defined shapes amidst a blue sky can really make an image pop. The other benefit here is the light you get. The clouds act as a natural light diffuser. This cuts any harsh light and gives it a softer touch. If you’re looking for a softly lit portrait, wait for the clouds.
How to Use Natural Light for Amazing Landscape Photography
Natural light is the perfect way to light any landscape scene. Different light comes at different times of the day. Seasons and weathers bring their own touches. These different temperatures and intensities of light only benefit your landscape photograph. They can add contrast, texture and colour casts. If you’re looking for ways on how to boost your landscape photography, utilize the natural light. It can make all the difference.
How to Shoot Street Photography in Any Light: From Rainy Days to Bright Sunshine
The weather can change at the drop of a hat. One of the areas that are affected by this is street photography. You may think that adverse weather would make for poor images. For portrait photography, you might be correct. Street photography can benefit greatly from sleet, snow or even angry clouds bringing rain. Our article tells you how to capture the street in any light.
How to Master Golden Hour Photography
The golden hour is like catnip for landscape, architectural and portrait photographers. This is the hour just before the sun sets, and before the sun rises. It adds a beautiful, warm ambient light to the whole landscape. It isn’t as strong as direct light. This makes it easier to balance against shadows and low light areas. This is a great time to photograph silhouettes. The sky has beautiful, warm details exemplified by the counter-weighted shape doused in shadow. Read our extensive article here on why you will love shooting in the golden hour.
DIY Photography Lighting Tips
10 DIY Lighting Ideas
Lighting is always needed in low-light situations, or if you want to create an interesting effect. You’ll find them in studios most of the time, and they can cost a fortune. Luckily for you, we have collected the best ten ideas you can use to make your own, DIY photography style. Read our ideas here in our extensive article. You won’t need anything else.
Speedlite Modifiers
You might have seen the many different kinds and styles of lighting they have in professional studios. You might also have checked out how much they would all cost. They are very expensive, but all is not lost. You can create similar techniques for a fraction of the cost. All you need to start is a Speedlite. One simple way of making an intense beam of light is to use a Pringles can and some straws. Did I mention you need to be creative? Read our article here on how you can have fun while modifying your Speedlite.
How to Make a DIY Lightbox
A lightbox is something you can make easily at home. Its purpose is to create a white space that allows that item to look as if it is floating in space. This box, coupled with a few lights will help you create a beautiful, constructive product photography setup. And it won’t cost you an arm and a leg either. Find out how to make one here and how it will benefit your DIY photography skills.
Creative Lighting Techniques
How to Use a Ring Flash for Creative Lighting
A ring flash is easily explained as a flash that comes in the form of a ring. This lighting solution fits around your lens, rather than sitting on your camera. This was first designed for dental photography. It allowed a complete blanket of light that created shadow-less images. Nowadays, photographers use them for close-up portraiture. If you ever wondered how it can be used for creative purposes, read our article here. It has everything you need.
How To Get Creative With Fairy Light Photography
Fairy lights are a versatile way to light a subject. They add a minute amount of light, which can be placed very close to the subject you are capturing. What makes them so special is their size. The wire they sit on helps you attach, wrap or even curl around almost anything. You’ll also find they are perfect for bokeh purposes. Use them to add interest to the background, or a hint of interest in the foreground.
How to Create Impressive Light Graffiti
Impressive light graffiti comes from great planning. Having the appropriate lighting tools is only half of the battle. Unless you have a great location and something interesting to write, it is going to be a challenge. For all the tips and techniques you’ll need, read our article. This is a great starter for those interested in images that impress.
How to Take Awesome Color Gel Photography: 10 Ideas
If you’re looking for a more interesting and creative way to capture portraits, you’re in the right place. Colour gels are pieces of coloured cellophane that fit over your speedlight or strobe flash. They add a pop of colour where it would otherwise be white. They can be used in conjunction with other colours, adding depth. Let your creative side loose and use this article to create some memorable portraits.
How to Photograph Christmas Lights
Christmas lights or fairy lights are a great way to light a scene. They are versatile and usually, long enough to go anywhere you need them too. As this source consists of many tiny lights, they can be used in numerous different scenarios. Perfect for adding small amounts of detail that don’t steal the show. For tips on how to use them for product and food photography, read more here.
How LED Light Sticks Are Taking Light Painting Photography to a New Level
LED light sticks are a new way to light your subject and scene. They are mobile and versatile in what they can create. For light painting, LED light sticks are the way to go. Especially if you are looking to add interest to your background. All you need is an LED light stick, long exposure, and this article. Then you’re ready to go.
Adding Light During Post-Processing
How to Achieve Artistic Chiaroscuro Lighting in Photography
During photography, the stage is not the only time where you can incorporate light into your image. This can also be completed during the post-processing period, by using an editing software package such as Photoshop. One photography lighting technique that you may wish to incorporate is the chiaroscuro style, reminiscent of 1940’s noir films. This style adds interest and helps you turn a photograph into a story. It also helps to add depth to an image, making the ambience feel a little warmer.
How to Create Cool Lighting Effects in Photoshop
If you didn’t manage to capture the light while photographing, you can add it to the final stage of your image workflow. One style that can be added later in Photoshop is the graduated filter. This allows you to add light to specific parts of the image. By not applying the lighting style to the entire image, you keep the quality and the mood of the image. Read here on how you can use this to the benefit of your photography.
Conclusion
Whether you are new to photography or already have advanced skills, there is always something new to learn when it comes to photography lighting. The goal of this article is to help you with mastering different lighting techniques. We hope that you are on your way to capturing better images!


