[ExpertPhotography is supported by readers. Product links on ExpertPhotography are referral links. If you use one of these and buy something, we make a little bit of money. Need more info? See how it all works here.]
How to Add Texture in Photoshop
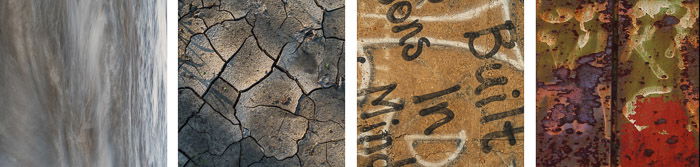
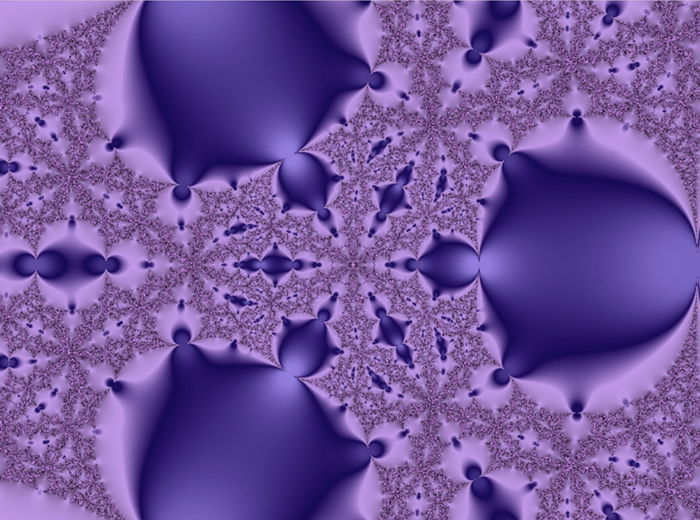
Texture overlays are photos that blend with your images. The texture image does not have a subject and often consists only of a detailed pattern. A texture is an image that focuses on the tactile elements in our world. They can be rough, smooth, fuzzy, or shiny. They can be abstract or have an identifiable subject. Once you start seeing them, you will find possibilities all around you. It is easy to find texture overlay files. Search stock photography sites like Dreamstime, and thousands of options appear. Many of these are free to use. You can also make your own texture files. There are textures in nature in a piece of driftwood or the pedals of a flower. Textures can be a graffitied wall, a rusty fence, or a concrete sidewalk. Use your macro lens to get close. Find abstract patterns that we do not usually see with the naked eye. Many smartphone apps create patterns or use a fractal generator to create colorful patterns. You can also use the many Photoshop filters to create backgrounds from existing images.
How to Add Texture in Photoshop
To add texture in Photoshop, you will need a photo and a texture image. Do not worry if the texture file is smaller than your main image. We will resize it. Your main image can be anything. Textures work well on images that are not already too busy and have some space around the subject.
Step 1: Open Images in Photoshop
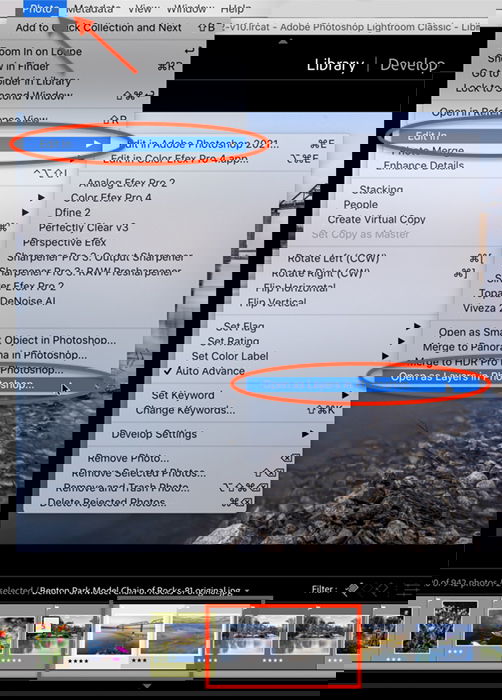
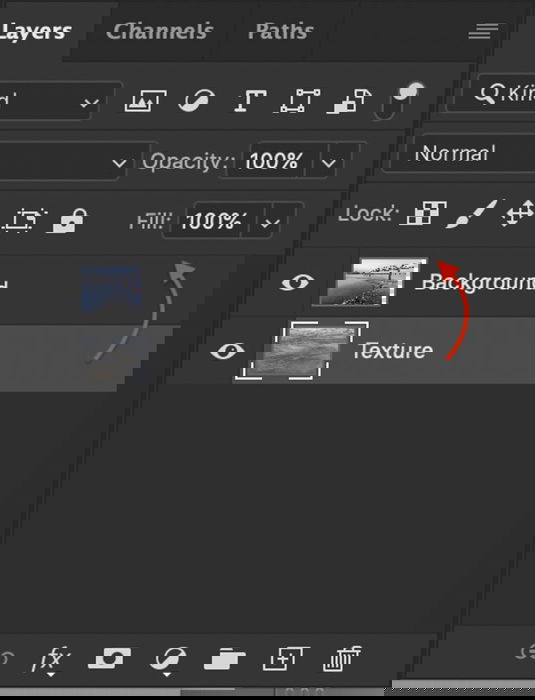
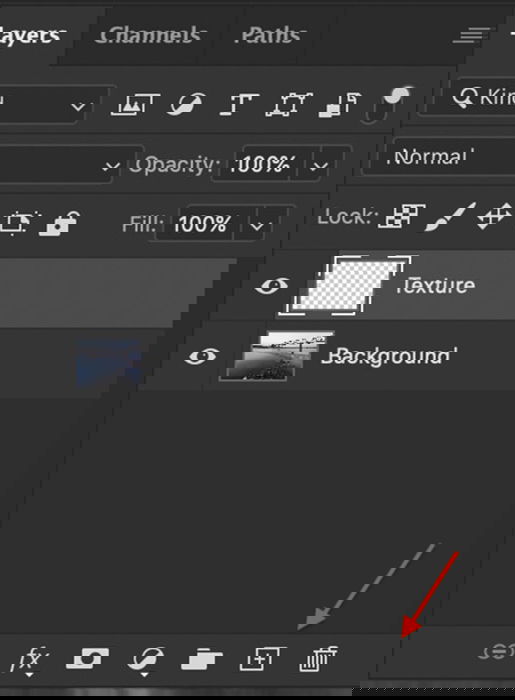
Open both your main image and the texture image in Photoshop. If you are working in Lightroom, highlight both image files and click Photo > Edit In > Open as Layers in Photoshop. This will open one Photoshop document with two layers. One layer is your main image, and the other is the texture. Rename the texture layer ‘Texture’. Drag your texture layer above your main image in the Layers panel if it is not already there. If you are not seeing the Layers panel in the lower right-hand column of the workspace, go to the Windows drop-down menu. Select Windows > Layers (or F7). To open files directly in Photoshop, first, open your main image. You can either right-click on the image and open it with Photoshop. Or you can open Photoshop first, then select File > Open and navigate to it. Photoshop will open most image files as well as pdfs. Once your main image is open, create a new blank layer. Go to Layer > New > Layer or use the new layer icon at the bottom of the Layers panel. This looks like a rectangle with a + sign. Rename this layer ‘Texture’, and click OK. Find your texture file and drag it into Photoshop. The texture will copy onto the blank layer. The next step is to resize the texture to fit over your image layer.
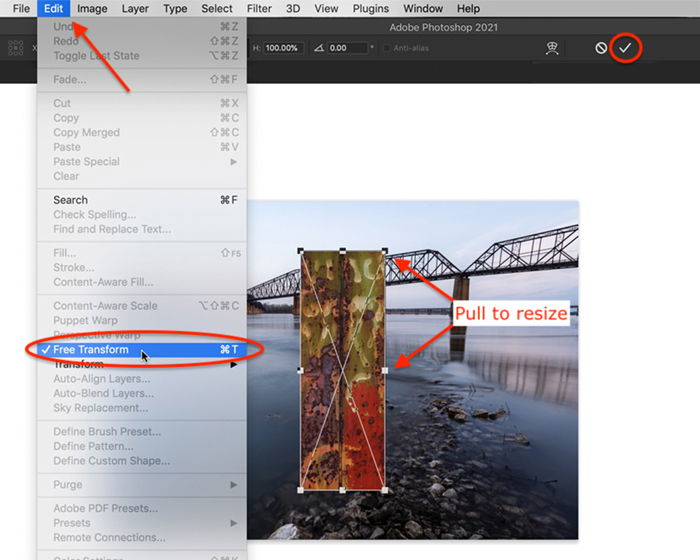
Step 2: Resize Texture Layer
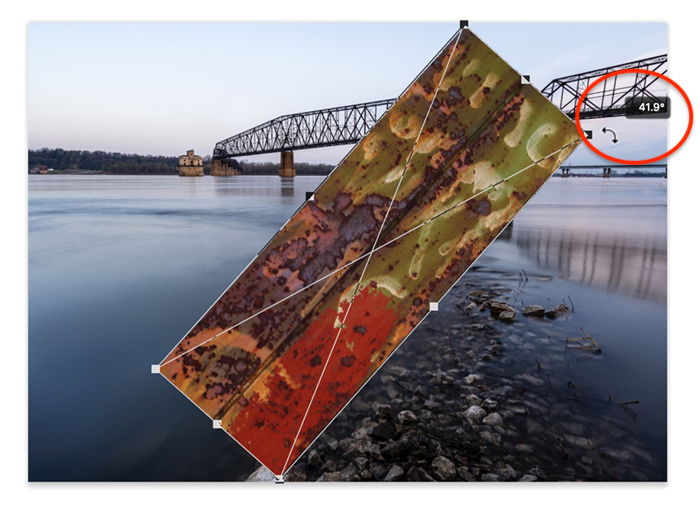
Select the texture layer and go to the Edit drop-down menu. Click Edit > Free Transform (Ctrl or ⌘T). Drag the corners and edges until the texture covers your image layer. Holding the shift key as you drag will let you drag each edge independently. Click the checkmark on the top of the workspace or hit Return or Enter. Also, try rotating the texture layer for a different effect. Go to Edit > Transform > Rotate 90° Clockwise. Or open Free Transform and hover your cursor over a corner. The cursor will change to an arc with two arrows. Click and pull the corners around to rotate the image. Resize until the texture layer hides your main image. The next step is to blend the layers. This will reveal your main photo and combine the layers.
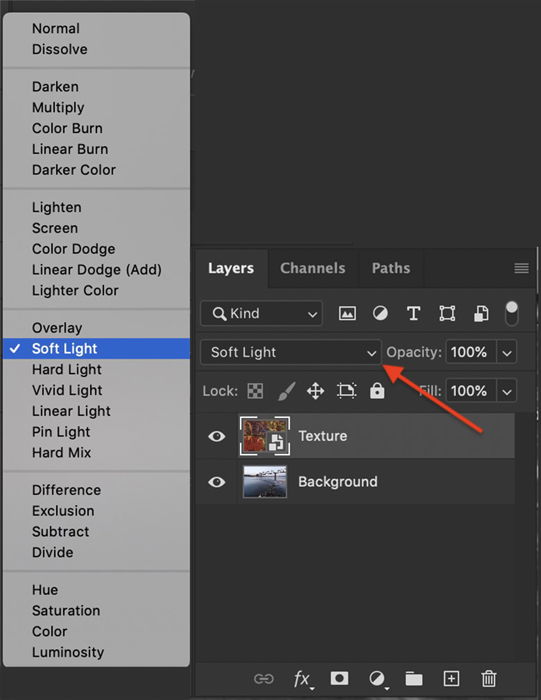
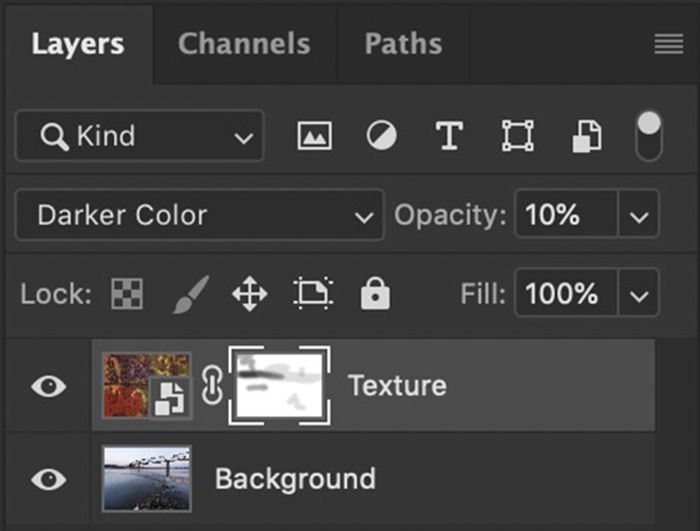
Step 3: Change the Blending Mode
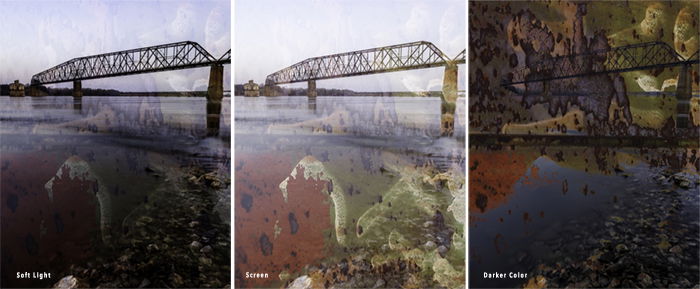
Blending modes are different ways the layers interact. The blend modes are near the top of the Layers panel. By default, the blending mode drop-down menu is set to Normal. There is no ‘right’ blending mode. When adding textures, popular blend modes are Lighten, Overlay, and Soft Light. But click through each blend mode to see how your image changes. Some blend modes let your main image show through more than others. Others will change the colors in your image. Do not worry too much about the details. Find a blending mode that you like. The next step is to refine how much texture shows through.
Step 4: Refine the Texture Overlay
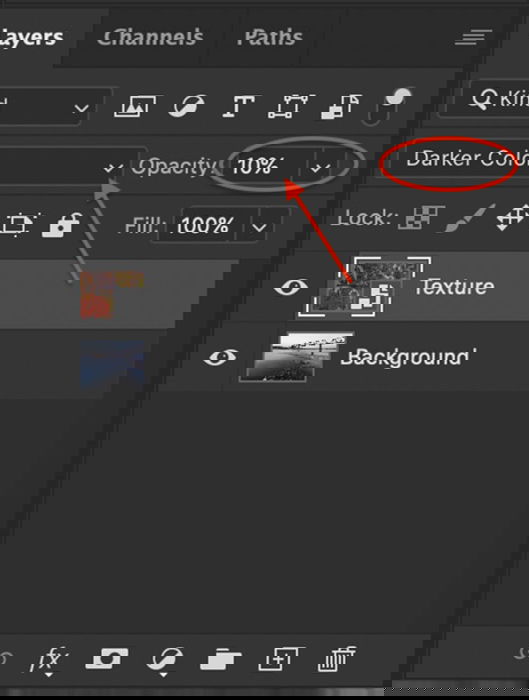
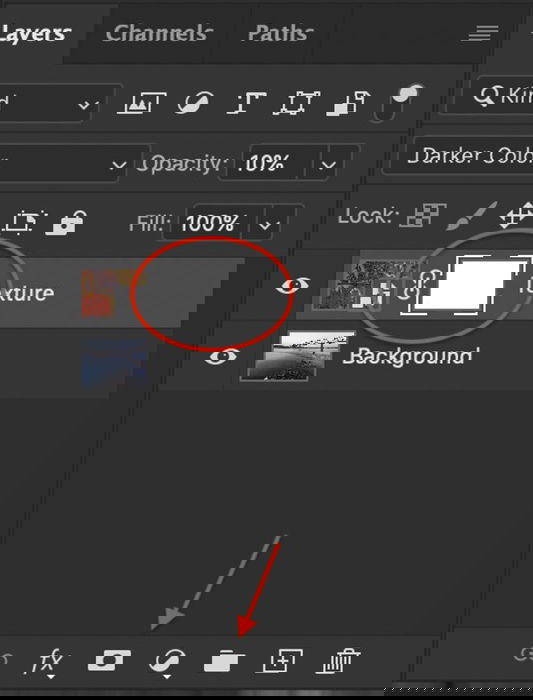
You can refine the texture overlay so that it shows through only where you want it. In most instances, we want the texture to show, but not overwhelm the main image. The first thing to do is lower the opacity of the texture layer. Click on the texture layer and select the opacity slider at the top of the Layers panel. There is no right opacity. Try setting the opacity at 50%. Then add more or less transparency until you feel the balance is right. You can also lighten or remove the texture from parts of your main image. For instance, when my main image contains a person, I often remove or lighten the texture on the face. To do this, create a layer mask. Click on the texture layer and go to Layer > Layer Mask > Reveal All. Or click the layer mask icon at the bottom of the layer panel. This looks like a rectangle with a circle inside. You should now see a white rectangle to the right of your texture. Click on the white layer mask. Select the paintbrush tool and set it to black. Use a soft paintbrush set at a 40 – 50% opacity. Paint over the places where you want to remove the texture. Notice that black appears on the white layer mask as you paint. Black hides the texture layer. If you make a mistake and want to add texture back to an area, switch to a white paintbrush and paint the texture back in. White reveals the layer. With a low opacity paintbrush, you can lighten the texture from an area without removing it completely.
Layering Textures
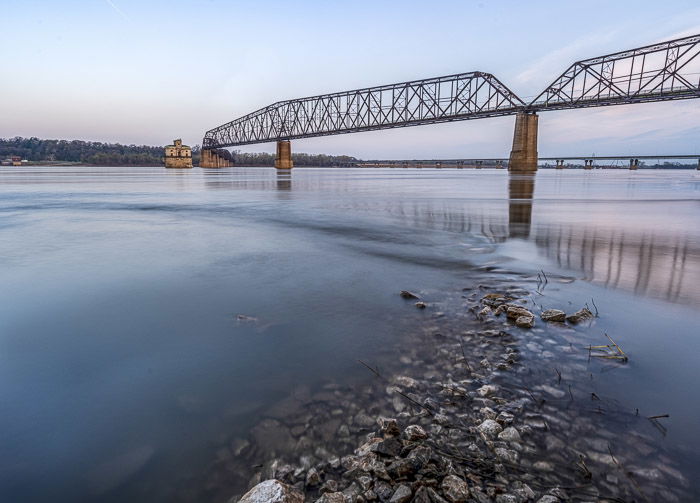
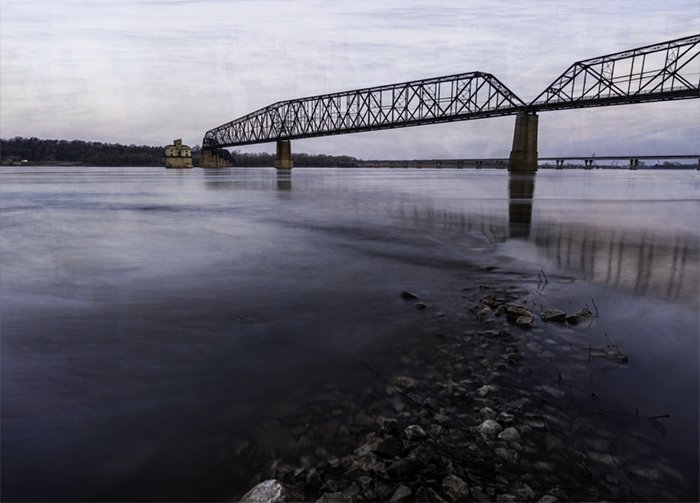
To enrich the texture effect, stack more than one texture onto your main image. You can add a texture layer on some elements of your image and a different texture on other elements. For instance, you can use one layer for the background and another for a foreground element. In this example, I added a texture made up of waves from the water. This added more texture, especially in the sky.
Conclusion
There is no limit to the amount of visual interest you can create using textures. To add texture in Photoshop is easy. Even a subtle texture makes a photo more interesting. The viewer may not even realise what you have done to achieve a rich look. The blend mode gives the textures a unique look. You can use the same texture on many different images and change the blending mode. The results will be different each time. This, plus the ability to layer textures, opens up unlimited possibilities. With textures, you can make your images look like they are printed on paper or silk. You can create a faded, vintage look or a shiny, futuristic effect. Textures are easy to apply, but the creative possibilities are endless. For more tips and tricks to make your images stand out, read our guide to Wow Factor Photography